London is a living museum of architectural history. From the Georgian terraces to the intricate detailing of Victorian townhouses, each creaky step and scuffed floorboard tells a story, stories that deserve to be preserved, not polished away.
Similarly, if you live in or have recently purchased a period property in London, you may be wondering how to balance restoration with preservation. One of the most powerful ways to honour your home’s heritage is through the careful restoration of its original wooden floors.
Floor sanding, when carried out with the right tools and approach, can reveal the natural beauty of aged timber floorboards while maintaining the architectural integrity that gives historic homes in London their distinctive charm.
Let’s explore why your period property’s floors deserve a little extra care and how the right floor sanding process can help you preserve the character of old buildings for generations to come.
Significance of Wooden Floors in Heritage London Homes
Wooden floors in historic homes in London are a vital part of their story. From hand-cut planks laid in the 1700s to decorative parquetry, each timber floorboard has witnessed centuries of life and change.
What sets them apart from modern alternatives is their uniqueness.
Each board holds the marks of time, knots, and nail holes that add to the home’s authenticity. Unlike engineered flooring, which often aims for uniformity, original wooden floors bring a tactile connection to craftsmanship that simply can’t be replicated.
Preserving Wooden Floors = Preserving the Soul of a Building
Many homeowners don’t realise that original flooring is one of the few untouched features left in period homes. Restoring and preserving wooden floors improves the visual appeal and also safeguards a major element of the property’s identity.
Unfortunately, some renovations unintentionally erase that identity with the often overlooked sanding process.
That’s where sympathetic and professional floor sanding becomes necessary. When done correctly, it enhances the original materials rather than replacing them, giving old floorboards a new lease of life while protecting their heritage.
Why Heritage Floors Need Special Treatment
Unlike modern materials, aged wood carries decades of wear, movement, and exposure. In this case, it needs to be treated with care and respect, not with aggressive sanding machines or a uniform sanding method.
Old vs. New: Understanding the Differences
Where modern floors might be perfectly even, consistent, and sealed, heritage floors often feature natural undulations, slight gaps, and variable wear patterns. These are not flaws to be corrected but features to be revived. Treating them the same way you would a brand-new floor risks losing what makes them special.
Challenges Unique to Period Properties
- Warping: Long-term exposure to moisture and temperature changes can cause boards to curve or lift.
- Patch repairs: Past owners may have swapped boards with different wood species or styles, creating mismatches.
- Uneven surfaces: Settling over time often leads to undulating floors that need gentle sanding rather than levelling.
- Delicate finishes and inlays: Many period homes still have intricate border patterns or original stains that can be damaged by deep sanding.
Preservation Over Replacement
The temptation to rip out and replace may be strong, especially when faced with heavily worn areas, but keeping the original boards where possible is always the better option. Through careful restoration and sympathetic sanding, you retain the craftsmanship and materials that make your home truly one of a kind.
The Role of Floor Sanding in Heritage Home Preservation Projects
Original timber flooring in a period property becomes a feature rich in history, texture, and beauty. But over time, it can lose its lustre, becoming dull, uneven, or stained. This is where floor sanding plays a pivotal role in heritage home restoration.
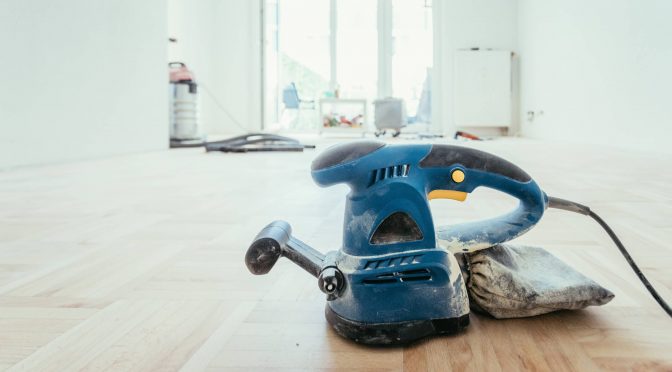
Bringing Life Back into Tired Floors
Floor sanding done properly can transform worn wooden boards without compromising their character. Rather than replacing original timber, the aim is to revive what’s already there, revealing the hidden grain, smoothing out wear marks, and enhancing natural colouration that’s been dulled over time.
It’s not about achieving perfection. Some of the quirks, such as the knots, historic nail holes, and soft undulations, are what make these floors so unique. Gentle sanding respects this, allowing the wood’s history to shine through.
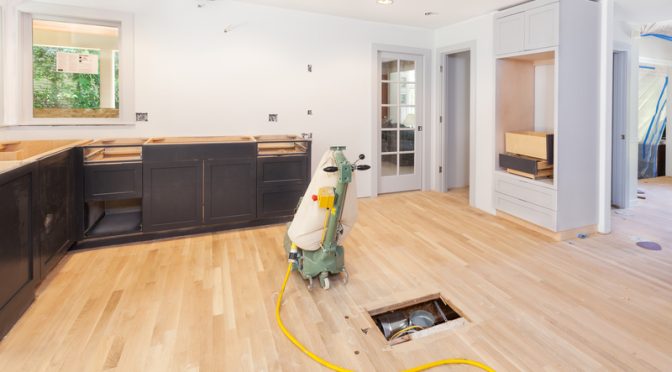
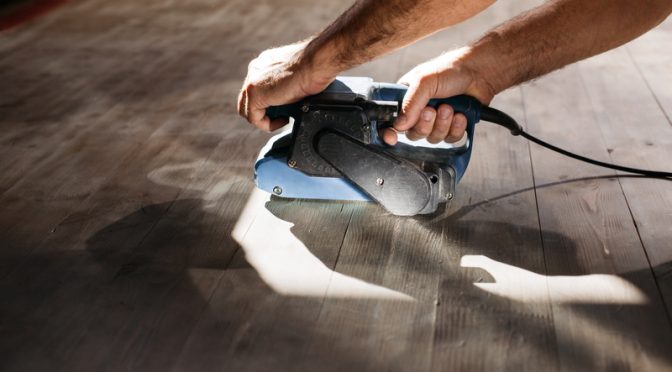
Why Dust-Free Sanding is Essential
Unlike the sanding methods of old, modern techniques now allow for dust-free sanding. This is particularly important in period homes where you want to avoid spreading fine dust into cornices, coving, or delicate furnishings.
Dust-free systems use high-filtration vacuums attached directly to the sanding machinery, helping keep your home clean and your air quality safe.
It’s a small detail that makes a huge difference, especially when working in older properties where finishes and materials can be sensitive to contamination.
Preserving the Patina of Age
One of the biggest mistakes when restoring heritage floors is sanding too deeply. Over-sanding strips away surface wear, but also removes the original patina that took decades to form. Skilled sanding involves just enough abrasion to refresh the surface without erasing the subtle signs of age and craftsmanship.
Conservation-Grade Finishes for Period Aesthetics
Once the sanding is complete, the finish you choose matters enormously. In historic homes, it’s important to use conservation-grade finishes that replicate traditional materials and give a sympathetic, low-sheen look.
Modern finishes like polyurethane can look too ‘plastic’ and glossy, clashing with the surrounding period décor. Instead, opt for hard wax oils or natural oils that enhance the natural tone and grain while remaining breathable and authentic.
Longevity with Authenticity
A carefully sanded and properly finished heritage floor won’t just look good, it will last for decades. With the right upkeep, you can reinforce the floor’s strength and wear resistance without losing the historical detailing that makes your home so special.
Floor Sanding Do’s and Don’ts for Period Homes
When working with period properties, it’s vital to approach floor restoration with care, respect, and the right techniques. One misstep can strip away years of character. Here are some essential dos and don’ts to guide you through the process and ensure your floors retain their timeless appeal.
Do:
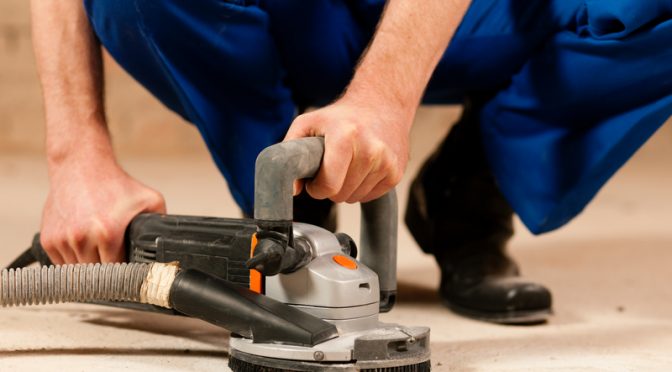
1. Use dust-free equipment to protect interiors
Older homes often feature ornate skirting boards, decorative cornicing, and other delicate features that can easily trap dust. Dust-free sanding systems minimise mess, protect your interiors, and create a safer environment, especially important if your home is still lived in during renovation.
2. Work with professionals experienced in historic restorations
Period homes aren’t like new builds, because they require a different skill set. By choosing floor sanding specialists who understand heritage home restoration, you’ll ensure the right tools, techniques, and finishes are used to respect the age and condition of your floorboards.
3. Maintain original patterns and board configurations
Whether you’ve got diagonal-laid Georgian boards or intricate Victorian borders, preserving the original layout is key to maintaining the character of old buildings. Realignment or patchwork repairs should be sympathetic to the original design.
4. Opt for conservation-grade materials
Avoid synthetic finishes and instead go for conservation-grade finishes such as natural oils, waxes, or shellac. These not only offer long-lasting protection but also align better with traditional craftsmanship and the look expected in period properties.
Don’t:
1. Over-sand and remove too much of the original material
It can be tempting to keep sanding to achieve a perfectly smooth finish, but in doing so, you risk taking away the very surface that holds historical value. Remember, less is more when it comes to heritage floors.
2. Use modern high-gloss polyurethane finishes
While durable, these types of finishes often look out of place in older homes. Their artificial sheen can make timber floorboards appear plastic-like, detracting from their natural beauty and clashing with period aesthetics.
3. Ignore the quirks and imperfections – they are part of the charm
Tiny gaps, slight undulations, or nail marks aren’t defects as they’re reminders of a floor’s story. Embrace them as signs of authenticity rather than flaws to fix.
4. Attempt deep sanding on already-thin or delicate boards
Some floors have already been sanded several times over the decades. If your boards are particularly thin or fragile, heavy sanding can cause irreversible damage. Always assess first or seek expert guidance.
Preserve Your Period Floors With Expert Care
When it comes to restoring character-rich floors, the right tools make all the difference.
At Floor Sanders London, we provide high-quality, reliable floor sanding equipment that’s specifically designed for delicate wooden flooring, perfect for heritage home restoration and equally suited to modern wood floors.
Whether you’re working on a listed Georgian townhouse or refreshing Edwardian parquet, our machines are built to handle your flooring with care. From dust-free sanding solutions to a complete sander package ready for any project, we’ve got you covered. For a wide range of project requirements, we have the right set of tools.
If you’re unsure where to begin or need help choosing the best approach for your home, call us on 0208 427 6604 for expert advice.
Prefer us to reach out? Fill out our quick enquiry form, and one of our team members will be in touch to guide you through your project with confidence and care.