Once you’ve finished sanding your project, you may notice that the edges are still a bit rough or uneven. This is especially common when sanding a wood floor, as the grain can cause the sandpaper to create different textures on the surface. To create a more finished and professional look, it’s important to blend the edges after sanding.
There are a few different ways to blend edges after sanding, but the most common method is called feather sanding. This technique involves using a sanding block or sandpaper to lightly sand the edge of the project, moving towards the centre of the surface. The goal is to create a smooth transition between the edge and the rest of the project.
Here Are a Few Tips for Feather Sanding:
- Use a sanding block or sandpaper with a grit of at least 220.
- Sand in a light, even motion.
- Avoid sanding too aggressively, as this can create a dip in the surface.
- Check your progress frequently and stop sanding when the edge is smooth and blended.
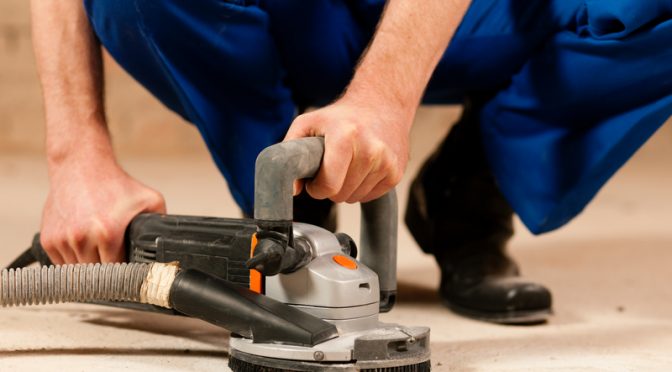
If you’re working with a large project, you may want to use a power sander to feather the edges. However, be careful not to over-sand, as this can damage the surface. The perfect floor sander for this job is a floor edger.
What is a Floor Edger?
A floor edger is a power sander that is specifically designed to sand the edges and corners of a room. Floor edgers are typically smaller and more lightweight than other types of floor sanders, making them easier to manoeuvre in tight spaces.
Floor edgers typically have a rotating sanding disk that is attached to a long handle. The disk is positioned at a slight angle to the floor, so that it can sand the edge of the room without damaging the baseboards.
Floor edgers are used in conjunction with other types of floor sanders, such as drum sanders and orbital sanders. Drum sanders are used to sand the main area of the floor, while orbital sanders are used to sand smaller areas and smooth out any rough patches.
Floor edgers are an essential tool for refinishing hardwood floors. They allow you to create a smooth and even finish on the edges of the room, which is important for achieving a professional-looking result.
How to Use a Floor Edger
To use a floor edger, start by sanding the perimeter of the room. Position the sanding disk against the baseboard and slowly move the edger forward. Be careful not to press too hard, as this can damage the baseboard.
Once you have sanded the perimeter of the room, you can start sanding the corners. To do this, position the sanding disk in the corner of the room and slowly move the edger back and forth. Be careful not to sand too much in one spot, as this can create a dip in the floor.
Once you have sanded the entire perimeter of the room, you can use a drum sander or orbital sander to sand the main area of the floor. Once you have finished sanding the entire floor, you can apply a coat of stain or sealant.
Hire a Floor Edger Today
Once you’ve blended the edges of your project, you can finish it off with a coat of paint, stain, or sealant. This will help to protect the surface and give it a polished look.
Looking to use a power tool for your blending job? Hire a floor sander today to help make your sanding project faster, easier and more efficient. Contact Floor Sander Hire today to find out more.

