All posts by admin

Beginners Guide to Sanding Pine Floors

Top tips to help you get sanding


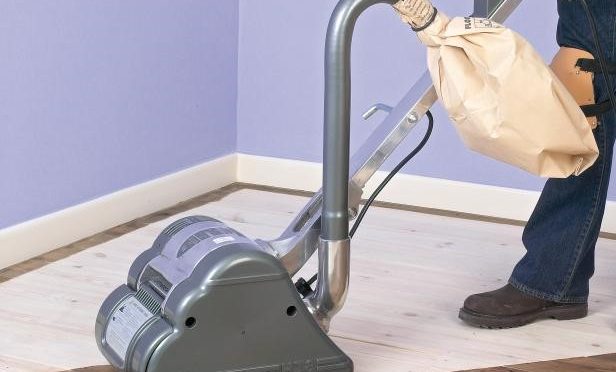
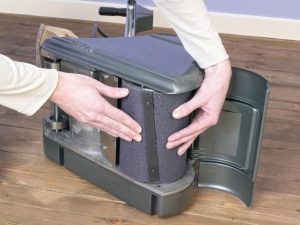
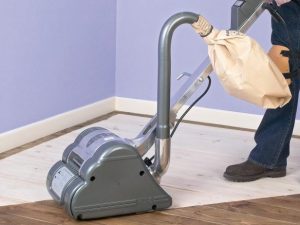
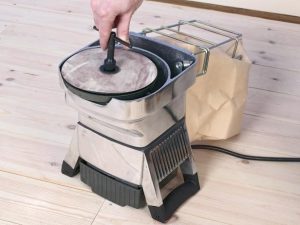
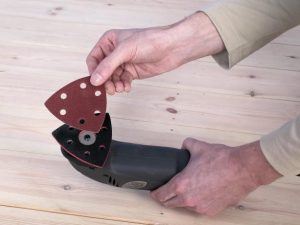
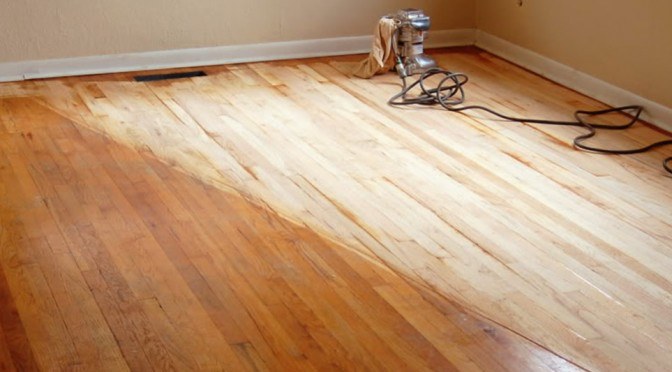
In the interest of saving money, you may opt to sand your own pine floors. All this requires is the hire of the high-quality tools that we supply here a The Floor Sander Hire Co. Some of the companies you hire in to do the job may only be interested in the pay. However, sanding pine floors does not always have to be an expert-only job. With time you’ll benefit from the importance of doing this job for yourself. You save some money and the quality of work you do is better. Though most floors are made of hardwood, pine is a soft wood. The procedure used for sanding softwood floors is not the same as the one for hardwood floors. A gentle and soft touch is a very important consideration when doing this job. An electric sanding machine is the best choice if you want to complete the work quickly, though doing it by hand is still an alternative. Continue reading Beginners Guide to Sanding Pine Floors

Why You Should Do Dust Free Floor Sanding


Alongside with help from floor sanding, wooden floors add style and elegance to any property, varying significantly from contemporary to traditional. Their initial outlay may be more than another alternative of carpets, but their longevity and value for the money can always outweigh exactly that. Wooden flooring evidently boasts a sophisticated history with huge variations, allowing property owners to create a unique space through stain and surface options.

Solid wood floors exude warmth, and high-quality varieties are best equipped to offer durability with resistance against daily living in high-traffic areas of any home. Routine mopping is required to ensure wood floors are kept clean and fresh; dust mites, mildew, and mould are unable to breed. A hardwood floor is an ideal solution for households with small children or pets.

The Dust free floor is important for the following reasons:

Continue reading Why You Should Do Dust Free Floor Sanding

How to Prepare Wood before Staining

Looking after your furniture, flooring, or anything else in your house made of wood is important if you want it to last. This especially goes for anything wooden you own outside. Wooden garden furniture, decking, or a wooden gazebo will especially need staining in order to protect it from the rain.

But before staining anything wooden, you’ll need to prepare it. Preparation is key to ensuring that, when you apply the stain, it seeps into the wood properly and evenly, providing the best protection. Luckily, we’ve done the hard work for you and compiled a guide to preparing wood for staining. So read on to become an expert!

Continue reading How to Prepare Wood before Staining

Can you use a floor sander on a deck? How do you sand a deck?

Spring has sprung, and fortunately, that means we’ll be spending a lot more time outdoors in our gardens. Many people will be spending this time on a wooden deck, overlooking their gardens whilst reading, or enjoying a barbeque. But the winter weather may have taken its toll on your decking, leaving it looking dirty, grey, and uninviting. Fortunately, it’s possible to breathe new life into it by sanding it down and retreating it. Continue reading Can you use a floor sander on a deck? How do you sand a deck?

4 key reasons why your hardwood floor needs regular maintenance

Hardwood is the king of domestic flooring and a personal favourite of ours. Not only is it is durable and hygienic, but it looks simply gorgeous, with the power to accentuate natural décor and raise the value of your property.

But the appeal of your hardwood flooring can be ruined by letting it succumb to scuffs, scratches and general wear and tear. So, to keep your floor looking its best, it is advised you treat it with regular sanding and varnishing.

hardwood floor freshly polished and sanded

Newer, smoother look


All types of flooring lose their flair over time, becoming dull from wear and tear. One of the biggest benefits of hardwood flooring is that, when it starts to look dull, you can simply sand away the dull layer and reveal a fresh one.

This layer makes the hardwood look like new again, giving it a smoother appearance. The new layer also allows easy applications of different aftercare products to extend the life of the flooring.


Complements the rest of the room


On top of a shinier appearance for your floor, your hardwood also does wonders for the surrounding area. The smoother your floor is, the more reflective it will become. A well-maintained floor can effectively reflect light and spread it around to brighten up any room.


Even flooring


Regularly sanding your floor means that you can keep it as even as possible, which makes fitting furniture much easier. Level flooring also makes it less prone to collecting dust and other debris and reduces the chances of suffering from a slip or fall within your home.

After every treatment with a sander, your hardwood floorings resistance to movement will decrease more and more – preventing the build-up of dust. This helps your floor stay much fresher over time, and reduces the amount of tedious cleaning your flooring will need in the future.


Allows easy staining and varnishing


Unlike carpets and rugs, you can reinforce hardwood flooring with a variety of effective varnishes and lacquers that protect it against moisture and unwanted drafts.


How to use a floor sander: Your Go-To Sanding Guide

Refinishing your hardwood floor can really give a room a new lease of life, adding a sense of brightness and sophistication by removing the scuffs and dirt that may have built up over the years. Doing so can be a fairly labour intensive process though, so it’s important to make sure you know what you’re doing before you start.

Once you’ve read this article, you should be fully prepared to start sanding down your hardwood floor.

Preparing the room

As with almost all DIY jobs, preparation is key. Sanding is a very dusty and noisy job, so it’s important to make sure you don’t make a total mess of your house!

Make sure you cover and mask around any doors (to prevent sanded dust spreading to the rest of the house) and wear protective clothing yourself (including a mask over your mouth and nose). It’s also a good idea to open any windows, so that you’re working in a well-ventilated area, as breathing in the dust particles can be harmful to health.

Finally, check over the floor to make sure that there are no protruding nails which could tear the sandpaper or damage the drum sander as you’re running it over the wood.

The tools you’ll need

You’ll actually require three types of sander: a heavy-duty drum sander, heavy-duty edging sander, and a corner sander. Each type of sander will require its own specific type of sandpaper, so make sure you also get the right paper for each tool. When you hire your floor sanders, your hire support will be able to offer your guidance with acquiring the correct sandpaper.

Sanding the floor

Step 1: Setting up the Drum Sander

It’s important to make sure the sander is unplugged before securing the sandpaper. Once this is done, simply unscrew the retaining strip, then feed a strip of sandpaper underneath it. Feed the sandpaper around the drum, and then secure the end under the retaining strip, ensuring the cut sections are aligned with the retaining screws. Before tightening the retaining screws, ensure that the paper is taut and correctly positioned.

setting up the drum sander
DK – Do It Yourself Home Improvement, 2009 Dorling Kindersley Limited

In terms of choosing sandpaper, if the floor is in a bad condition, start with rougher 40-git paper. If the floor’s in a better condition, you can use a finer sand paper instead. Once all this is done, you can plug in the sander, tilt it back so the drum is off the floor, and start it up.

Step 2: Using the drum sander

Lower the drum onto the floor, and begin to move the machine diagonally across the room. Once you’ve made one run change direction and make another set of diagonal runs at a right angle to the first run. Finally, change direction again and run the machine down the grain of the wood.

Drum sander in use on half sanded hardwood floor
DK – Do It Yourself Home Improvement, 2009 Dorling Kindersley Limited

Make sure you move at a gradual, even pace in order to create an even finish. Once you’ve finished this, you’ll have done the main body of the floor, and there are only the edges and corners left!

Step 3: Setting up and using the edge sander

Like with the drum sander, make sure the edge sander is unplugged before replacing the old disc of sandpaper. To remove the old disc, use the bolt key supplied to undo the retaining bolt (this key can often be found on a retaining clip on the underside of the sander).

edge sander set up bolting sandpaper
DK – Do It Yourself Home Improvement, 2009 Dorling Kindersley Limited

Position a new disc of sandpaper, then retighten the bolt, making sure the retaining bolt is well below the sandpaper surface level. Once this is done, you’re ready to run the sander down the edges of the room. Make sure you use a finer grain sandpaper for the edge sander because you’ll be sanding across the grain.

Step 4: Setting up and using the corner sander

Changing the sandpaper on the corner sander is simple, just take a hold of the old piece of sandpaper and tear it off.

corner sander set up man fitting sandpaper
DK – Do It Yourself Home Improvement, 2009 Dorling Kindersley Limited

Take a new piece of sandpaper and align the pad before pressing it down. Once this is done, you can use the sander to sand the room’s corners, or any other had to reach areas (such as around a radiator).

Step 5: Finishing the floor

Once you’re happy the whole floor has been sanded, sweep up any dust and debris that hasn’t been picked up by the sanders’ dust bags. Finally, wipe the floor down with a damp cloth. If you find any rough areas whilst doing this, just sand them by hand.

You’re now ready to apply the varnish to the floor. You can apply two coats of water-based varnish in a day, given how quickly it dries, although you’ll need to do some light sanding in between. Then your floor will be finished, and you can step back and admire your work!

We hope you found this information useful – let us know via Facebook or Twitter what you’d like to learn more about, or what you found most interesting!