Refinishing your hardwood floor can really give a room a new lease of life, adding a sense of brightness and sophistication by removing the scuffs and dirt that may have built up over the years. Doing so can be a fairly labour intensive process though, so it’s important to make sure you know what you’re doing before you start.
Once you’ve read this article, you should be fully prepared to start sanding down your hardwood floor.
Preparing the room
As with almost all DIY jobs, preparation is key. Sanding is a very dusty and noisy job, so it’s important to make sure you don’t make a total mess of your house!
Make sure you cover and mask around any doors (to prevent sanded dust spreading to the rest of the house) and wear protective clothing yourself (including a mask over your mouth and nose). It’s also a good idea to open any windows, so that you’re working in a well-ventilated area, as breathing in the dust particles can be harmful to health.
Finally, check over the floor to make sure that there are no protruding nails which could tear the sandpaper or damage the drum sander as you’re running it over the wood.
The tools you’ll need
You’ll actually require three types of sander: a heavy-duty drum sander, heavy-duty edging sander, and a corner sander. Each type of sander will require its own specific type of sandpaper, so make sure you also get the right paper for each tool. When you hire your floor sanders, your hire support will be able to offer your guidance with acquiring the correct sandpaper.
Sanding the floor
Step 1: Setting up the Drum Sander
It’s important to make sure the sander is unplugged before securing the sandpaper. Once this is done, simply unscrew the retaining strip, then feed a strip of sandpaper underneath it. Feed the sandpaper around the drum, and then secure the end under the retaining strip, ensuring the cut sections are aligned with the retaining screws. Before tightening the retaining screws, ensure that the paper is taut and correctly positioned.
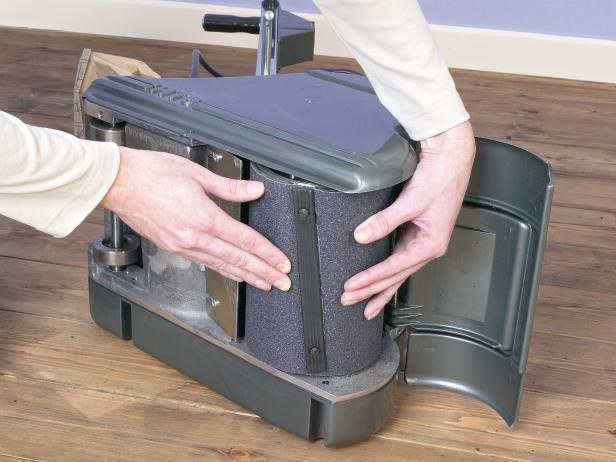
In terms of choosing sandpaper, if the floor is in a bad condition, start with rougher 40-git paper. If the floor’s in a better condition, you can use a finer sand paper instead. Once all this is done, you can plug in the sander, tilt it back so the drum is off the floor, and start it up.
Step 2: Using the drum sander
Lower the drum onto the floor, and begin to move the machine diagonally across the room. Once you’ve made one run change direction and make another set of diagonal runs at a right angle to the first run. Finally, change direction again and run the machine down the grain of the wood.
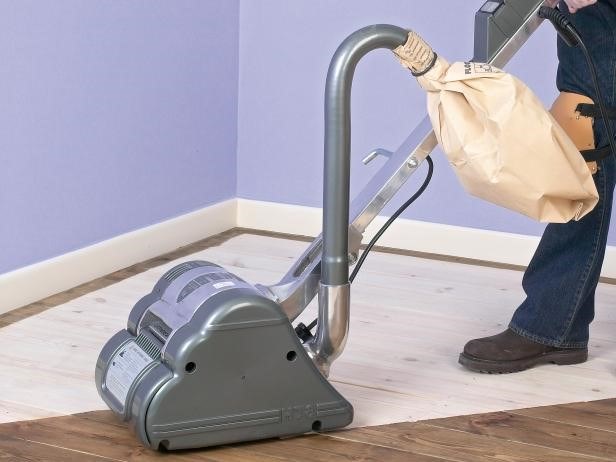
Make sure you move at a gradual, even pace in order to create an even finish. Once you’ve finished this, you’ll have done the main body of the floor, and there are only the edges and corners left!
Step 3: Setting up and using the edge sander
Like with the drum sander, make sure the edge sander is unplugged before replacing the old disc of sandpaper. To remove the old disc, use the bolt key supplied to undo the retaining bolt (this key can often be found on a retaining clip on the underside of the sander).
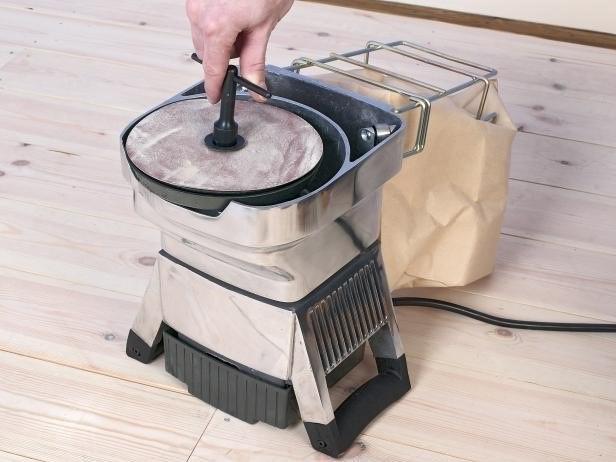
Position a new disc of sandpaper, then retighten the bolt, making sure the retaining bolt is well below the sandpaper surface level. Once this is done, you’re ready to run the sander down the edges of the room. Make sure you use a finer grain sandpaper for the edge sander because you’ll be sanding across the grain.
Step 4: Setting up and using the corner sander
Changing the sandpaper on the corner sander is simple, just take a hold of the old piece of sandpaper and tear it off.
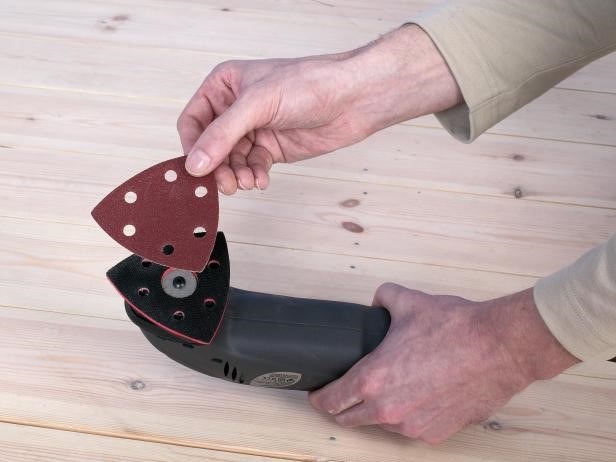
Take a new piece of sandpaper and align the pad before pressing it down. Once this is done, you can use the sander to sand the room’s corners, or any other had to reach areas (such as around a radiator).
Step 5: Finishing the floor
Once you’re happy the whole floor has been sanded, sweep up any dust and debris that hasn’t been picked up by the sanders’ dust bags. Finally, wipe the floor down with a damp cloth. If you find any rough areas whilst doing this, just sand them by hand.
You’re now ready to apply the varnish to the floor. You can apply two coats of water-based varnish in a day, given how quickly it dries, although you’ll need to do some light sanding in between. Then your floor will be finished, and you can step back and admire your work!
We hope you found this information useful – let us know via Facebook or Twitter what you’d like to learn more about, or what you found most interesting!