So You Want to Sand Your Own Floors?
If you need to sand your floors at home, then follow these instructions to be fully experienced with the Bona Floor Sander.
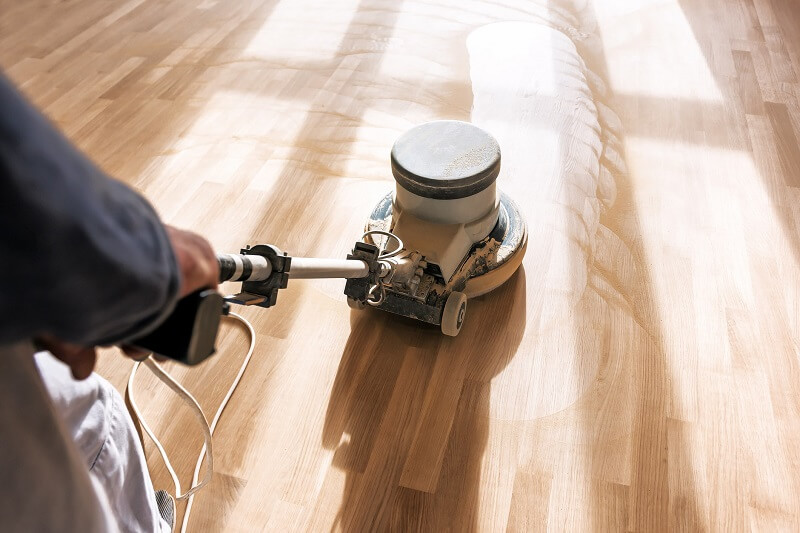
1) Coarse Sanding – Firstly, equip the coarse abrasives to the Bona floor sander. Then on your machine, set this to high pressure. Ensure the drum is raised off the floor before firing up the machine. Then, turn it on and gradually release the sanding drum towards your floor.
It’s important to do this process slowly and it’s essential the drum is always lowered.
● Begin on the left side of the room and sand in the direction of the grain. If you have an uneven floor, we advise you to sand diagonally. As you move forward, gradually lift the drum at the wall and re-engage when you go the opposite way. Lift the drum again and create a new walkway to the right-hand side.
● Once the entire area has been sanded, turn the machine around and sand the opposite end of the room. Keep repeating the above until all the floor is smooth and all residues are gone. Make sure the dust bag is empty before you begin to ensure maximum dust collection.
2) Edge Sanding – Attach the grit 40 abrasives.
● Operate in small circles.
● Don’t press onto the floor, let the machine do the work.
● Sand until smooth.
● Empty your dust bag.
3) Medium Sanding
● Set the Bona floor sander to medium pressure and attach the grit 60 abrasives.
● Sand in the opposite corner and follow the grain of the wood.
● Complete the process slowly and repeat on the way back.
4) Medium Edge
● Check that you’ve emptied the dust bag.
● Attach the grit 60 abrasives. Sand off all the scratches on the room’s edges. Do this until smooth.
5) Corner scraping – Now, remove the old coating from the room’s corners. It’s more effective and less time-consuming to scrape off the old coating with a scraper. Finish the job by sanding any excess coating.
6) Filling The Gaps – Filling in gaps gives the surface a finer, more professional look. The joint filler is made for slight gaps up to a maximum of 2 mm with floors that are stable.
● Shake the filler and then mix up the substance with the dust you gathered from the medium edge sanding. Mixing it in a separate container may prove easier. The best ratio is 1 part wood dust to 3 parts filler.
● Carefully apply the mix to the floor and evenly spread with a trowel. To get the best coverage, apply it diagonally in the direction of the floor’s grain.
● For any gaps, use a spatula to cover them.
● Allow drying for 30 to 60 minutes. If there are any gaps, apply a second coat.
7) Sanding The Edge
● Remove any residue left.
● Start at the edges, attach the grit 100 abrasives to the edge sander, and go around all the edges of the room.
8) Fine Sanding – Remove any filler and fine sand from the floor using the drum Bona floor sander with the abrasive grit 100.
9) Additional Sanding – If you are using oil or hard wax on your floor, then it’s best to complete another fine sanding. This is due to oil and hard wax highlighting abrasive scratches. Use the grit 100 on the edges and the grit 120 on the surface.
Should You Buy Your Own Tools or Use a Floor Sander Hire Service?
It’s not just the Bona floor sander that can be quite costly, any power tools for use around the home can set you back. However, while your floors will need sanding regularly to keep them looking their best, this doesn’t mean that you need to break the bank and buy the best equipment.
Consider sander hire by Floor Sander Hire London. They have extensive experience helping people get their floors looking great. They can conveniently arrange the right sander for you and ensure that it is a cost-effective way of getting the job done. If you are unsure of anything sanding-related, their knowledgeable team members are there to help you out. Contact us for further support.