If you have just pulled back an old, dusty carpet and spotted a classic herringbone pattern underneath, you have hit the property jackpot. But before you rush out to hire the first machine you see, parquet flooring restoration requires a bit of strategy. Unlike standard floorboards, parquet blocks run in multiple directions, and a heavy-handed approach can leave nasty gouges in your gorgeous oak. This guide walks you through everything you need to know, from assessing the floor beneath your feet to achieving a showroom-quality finish.
Is a parquet floor worth restoring?
Yes, in almost every case, a parquet floor is absolutely worth restoring. Solid parquet blocks, particularly the tongue-and-groove oak panels laid across British homes from the 1930s through to the 1970s, are typically 9mm to 22mm thick, meaning they can be sanded back multiple times over their lifetime.
These floors were laid at a time when quality mattered, and the timber itself is often denser and more stable than much of what is available today. A patterned herringbone or basket-weave floor, properly restored, is a feature that buyers and renters actively seek out.
Before committing, do a quick assessment:
- Check the thickness. Lift a loose block or inspect at a doorway threshold. If there is at least 4mm to 6mm of solid wood above the tongue groove, you have plenty of material to work with.
- Look at the adhesive. Many older parquet floors were laid in bitumen, a black, tar-like substance. This is completely manageable, but it does affect how you prepare the floor (more on that shortly).
- Count the loose or missing blocks. A few loose tiles are easily re-adhered. An entire section of missing blocks is more involved, but still far from a reason to abandon the project.
Sanding Parquet Flooring: Why Is My Sander Clogging or Gumming Up?
Your sander is clogging because old wax, polish, or bitumen adhesive is melting under the heat generated by friction and loading up the abrasive paper.
This is one of the most common frustrations people encounter when sanding parquet floors for the first time, and it has a straightforward fix once you understand what is happening.
The same issue arises with bitumen. When parquet blocks were bedded in bitumen adhesive, any over-application or block movement over the years means traces of that black, tar-like material can be present on the surface. Heat from sanding softens it, and it transfers directly onto your paper.
How to tackle it:
- Start with a coarser grit than you think you need. A 24-or 36-grit open-coat abrasive is far less susceptible to clogging than a finer paper, and it cuts through the contaminated top layer quickly before you move to progressively finer grits.
- Clean the floor first. For heavy wax build-up, apply a proper wax stripper or strong sugar soap solution and scrub it well before any machine touches the floor. The more surface contamination you remove manually, the longer your abrasive paper will last.
- Work in shorter passes. Sanding slowly or dwelling in one spot generates more heat. Keep the machine moving.
- Change your paper frequently. Trying to push a clogged disc further is a false economy. Freshen paper cuts properly; clogged paper just generates heat and scratches unpredictably.
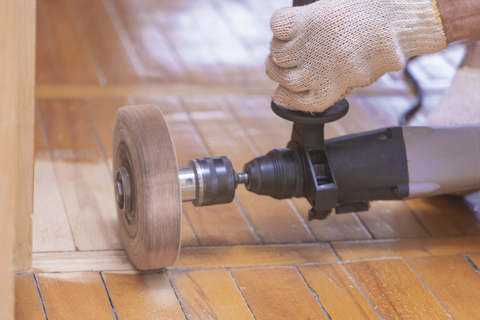
Can You Sand Parquet Floors with a Standard Drum Sander, or Should You Sand Diagonally?
You should sand parquet floors diagonally across the pattern, not straight along any single row of blocks. A standard heavy drum sander run parallel to one direction of the block layout will aggressively tear across the grain of the perpendicular blocks, leaving visible scoring and an uneven surface that is extremely difficult to rectify.
This is the most critical technique point in the entire parquet restoration process, so it is worth explaining clearly.
Why Parquet Is Different from Strip Flooring
With a traditional strip or plank floor, the grain runs consistently in one direction, and you sand along it. Simple. Parquet is an entirely different proposition. In a herringbone pattern, adjacent blocks are rotated 90 degrees relative to one another. In a basket weave, blocks alternate direction across the entire floor. No matter which way you push a drum sander, you will always be sanding against the grain of at least half the blocks at any given moment.
The Diagonal Technique
The solution is to work at a 45-degree angle to the dominant pattern direction – effectively sanding across all the blocks at a diagonal. This approach means the machine is cutting across the grain of every block equally, rather than raking aggressively against the grain of some while running with others. The result is a far more level, scratch-free surface.
Here is how a proper parquet sanding sequence works in practice:
- First diagonal pass: Work at 45 degrees across the room, using a coarser grit (24 to 36) to remove the old finish, level any uneven blocks, and address any surface contamination.
- Second diagonal pass: Sand at 45 degrees in the opposite direction (crossing the first passes) using a medium grit (40 to 60). This removes the scratches left by the coarser paper.
- Final passes: Move to a finer grit (80 to 100), and, if your specific pattern allows it, you can make a final light pass along the direction of the majority of blocks to refine the surface.
- Edge work: Use an edging sander for the perimeter where the drum machine cannot reach. Work carefully and keep it consistent with the surface passes.
Should I DIY my parquet flooring restoration or hire a professional?
If your parquet floor has minor wear, is in good structural condition, and you are comfortable with machinery, a carefully executed DIY restoration is absolutely achievable. However, there are specific situations where the risk of causing irreversible damage to a historical floor is high enough that bringing in a specialist is the wiser call.
When to Seriously Consider a Professional
There are scenarios where DIY carries real risk:
- Extremely thin blocks. If the blocks have already been sanded previously, there may be very little material remaining above the tongue.
- Extensive adhesive contamination on the surface. Bitumen that has risen through block gaps or spread across the surface is manageable, but it requires specific products and techniques.
- Highly intricate patterns. Straight herringbone is manageable. Decorative borders, inlaid features, or particularly complex basket-weave arrangements demand more precise machine control to avoid pattern distortion.
- Structural concerns. If blocks are hollow-sounding in large areas, or if the subfloor beneath is suspect.
- Listed buildings or period properties. If your floor is in a historically significant home, the consequences of getting it wrong extend well beyond aesthetics.
Choosing Your Finish: Seals, Oils, and Lacquers
- Once sanding is complete, the choice of finish determines the final look, durability, and maintenance requirements of your floor. This is not a decision to rush.
- Hard wax oils give a natural, low-sheen appearance that enhances the wood’s character.
- Water-based lacquers provide a harder, more durable surface with a cleaner, more contemporary look.
- Solvent-based lacquers offer exceptional durability and a slightly warmer tone.
- Traditional wax finishes are historically appropriate for period properties and give a beautiful, tactile quality to the floor.
Ready to Get Started?
Whether you are planning a full weekend DIY project or simply working out what is involved before making a decision, the team at Floor Sanders London is genuinely happy to help you plan the right approach for your specific floor.
- Browse professional floor sanding equipment from Floor Sanders London
- Use our sander package to choose, to make it straightforward to match the right equipment
- Bundled supply packages cover abrasives, preparation materials, and finishing products together
- Floor Sanders London’s wood floor accessories range covers everything from grain fillers and sanding sealers
From choosing the correct machine for your room size to sourcing the right abrasives and finishes, get in touch with Floor Sanders London for straightforward, honest advice from people who know parquet inside out. No hard sell, no jargon, just practical guidance to help you get the result your floor deserves.