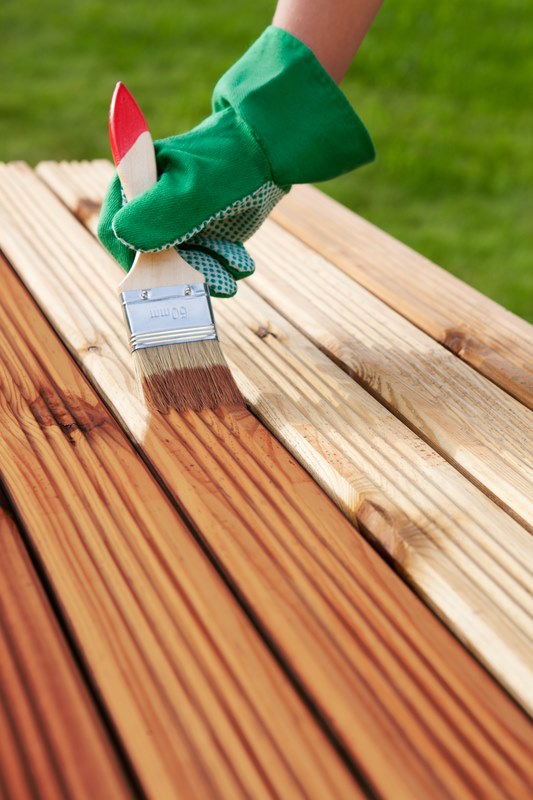
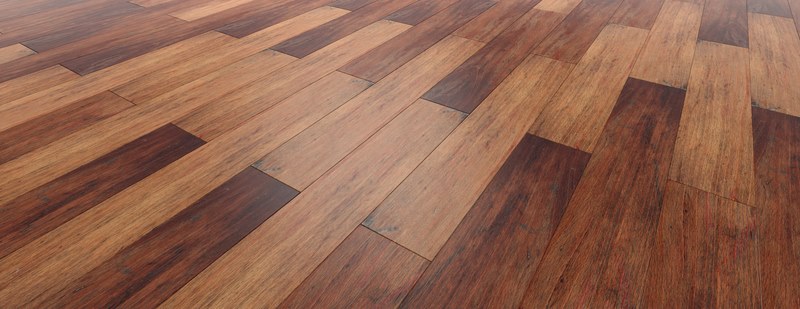
Wood finishes protect the wooden surfaces from moisture and make its appearance richer and deeper. The wood finish is a lot different than just painting the wood. Wooden finishes improve the way the wood looks and appear on the surface. The term finish can also represent several coats of finish or an entire build-up of the coating. Below we have listed the most common types of wood finishes.
Dyes match with the existing colour or it also changes the colour of the surface. Dyes are the kind of wooden finishes which are available in water-based and oil-based types. These wood varnishes guard inner wooden surfaces.
Oil wooden varnishes advance the presence of bare wood. Natural oils that are existing in wood dries out over time. Oils finish substitutes all the natural oils and nourish the wood again. It protects wooden well especially when furniture is on the wooden floor all the time.
Finishes are made up of oil and solvents. They are typically clear and transparent. They give better UV protection. Varnishes dry slowly. Application of the varnish on the top of dyes gives much better protection.
Wooden stains changes or improves the wooden colour. They are available in many different colours depending on which you prefer and what colour your wood is already. The wooden stains tend to perform better the darker they are. They don’t protect the wooden floor as much as some of the other wood finishes but still do protect it to some extent.
Lacquers are a thin solvent based finished as compared to the other finishes. They are usually applied by spraying. Lacquers dry fast because they contain evaporating solvent. It reaches deeper into the wood and nourishes the grains and brings out the natural beauty of the wood. Lacquers bring a glossy shiny finish to the wood.
French polishing is a wooden finishing technique with a beautiful high gloss finish, deep colours and a lovely shine. It involves putting on numerous coatings of shellac softened alcohol spreading it over with a pad greased with oil. The varnish is more gentle than modern polishes and lacquers. This makes scratches and marks seem minimal and hides them very well.
We understand that there are a lot of factors that go into choosing the perfect wooden floor, therefore, people want to look after the flooring. If the floor is maintained correctly and sanded and refinished when it is starting to age, then the floor will last a lifetime. The untreated wood acts like a sponge and absorbs everything that gets spilt on it. A glass of red wine on a finished table is no problem. However, if the wood were not treated, it would be stained permanently.
Do you want to find out more all about wood finishes and the best types for each type of wood, then please don’t hesitate in giving us a call on 020 8427 6604.
You have invested a lot into your floors, so you don’t want anything to compromise the integrity of the beauty that your wooden floors add to your interior décor. With any other wooden surface, wooden floors and wood finishes are prone to scratches. The number one culprit here is usually dirt and grit. There is a lot that you can do to minimise these scratches and protect your wooden floors to keep them looking as good as new.
Here are our five wooden floor protection tips:
Most scratches on wooden floors are from dragging furniture. Sometimes moving furniture around your house or office is unavoidable. If you are likely to do so, consider fixing rubber caster wheels on the furniture that you move around often.
The primary focus here is to find an appropriate cloth to place the furniture on. Furniture felt pads and area rugs, and floor mats are the best option for that. It also is crucial that you trap dirt and grit right at the entrance of your wooden floor rooms. It is advisable that you use a soft, woolly entry mat for this purpose.
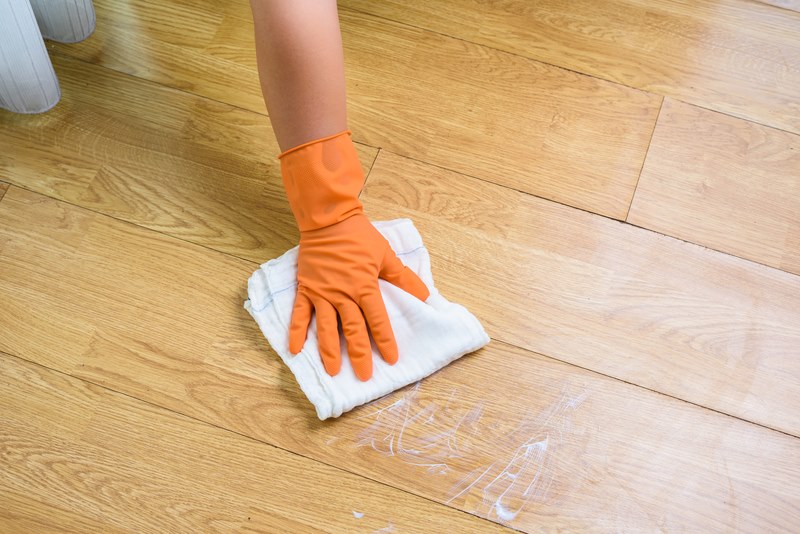
Some regular cleaning will help too, removing dirt and grit from your floor surfaces. This will prevent scratches and damage to your floor, remember to clean your furniture bases and legs. Any dirt, grit or cracks on furniture bases and legs are the leading causes of wooden floor scratches.
Recoating wooden floors is a viable option to harden wood floor surfaces to make them more resistant to scratches. However, it is not advisable that you use this method on pre-finished floors but on the floors that you finish on-site. It is best that you choose oil-based polyurethane wood finishes for your hardwood floors. These finishes are not only durable but also easy to recoat and maintain. Use house slippers or slipper socks instead of your outside shoes, this can also reduce your floors becoming scratched.
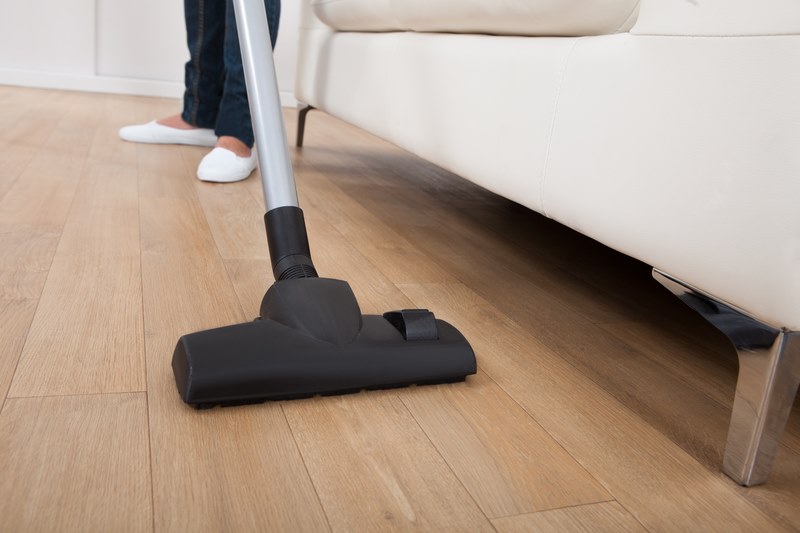
Forget about multi-purpose vacuum cleaners if you want to keep your wooden floors free from scratches. You can now purchase/hire vacuums which function best for cleaning your wooden floors, they use soft bristles to prevent scratching. Always use the right vacuum cleaner when cleaning your wooden floors.
Do all you can to protect your wooden floors to keep them looking beautiful, and if it does get scratched, hire a floor sander to get it looking as good as new!
There are various types of sandpapers, each of these different types of sandpapers is suited for a specific sanding task. The material that requires sanding also determines the type that will be needed. There are different sandpapers for sanding metal or wood surfaces. The level of success of the sanding project you’re undertaking is determined by choosing the correct sandpaper. If you need to smooth a surface, you should decide on the correct paper for you, there are different numbers, grits, grades and types of sandpapers. The following are the available types of sandpapers that you need to be aware of:
This type of sandpaper is meant to be used on surfaces made of plaster, wood and metal. However, it’s more preferably used for repairing wooden floors. Dry sandpaper is also preferred for exterior wood surfaces, painted surfaces of metals, interior walls and wood furniture. When used on these surfaces, the resulting finished job of a higher quality than if a different type of sandpaper had been used.
The most common places where the wet type of sandpaper is used are for reducing dust on interior walls, sanding fibreglass and metal surfaces. The abrasive material of the wet type of sandpaper is usually applied to either a sponge or cloth backing. Water in small amounts is applied for polishing the surface by acting as a lubricant. The sponge type often retains water for a longer duration than the one that has a cloth backing and contours to corners and curves. The wet sandpaper allows the grit to float over the surface that’s being sanded.
Special sandpapers are used with power tools. They include drums, discs, belts and pads. In case you’ve got a sanding power tool, ensure you’ve kept an ample reinforcement of the kind of sandpaper that it needs. As such, you’ll always be prepared to complete any job in the household as they come.
This type of sandpaper is great for sanding by hand. It’s mostly suited for raw wood for preparing the surface for finishing and removal of light scratches. This type of sandpaper quickly gets worn out.
Emery is great for both power sanding surfaces made of metal as well as hand sanding. The finer grits of this type of sandpaper are suited for polishing. Coarser grits are used for removing paint or rust.
This is a rather common type of sandpaper that’s used on drywall, metal, plastic and wood. It can be used for hand sanding but is most commonly preferred for power sanding since it’s very long-lasting.
This type removes material faster than the aluminium oxide type. The downside is that it doesn’t last as long as the aluminium oxide type. It’s used on metal, wood and plastic. The tasks performed using silicone carbide includes rough sanding, sanding between paints when finishing or for removal of rust and paint.
This type is suited for painted surfaces, metal surfaces, and fibreglass surfaces. It lasts longer compared to aluminium. It’s available in discs, belts and for power sanding.
This type is great for aggressive removal of material on wood and is available in discs and belts which are used for power sanding. They’re durable and last longer compared to aluminium oxide.
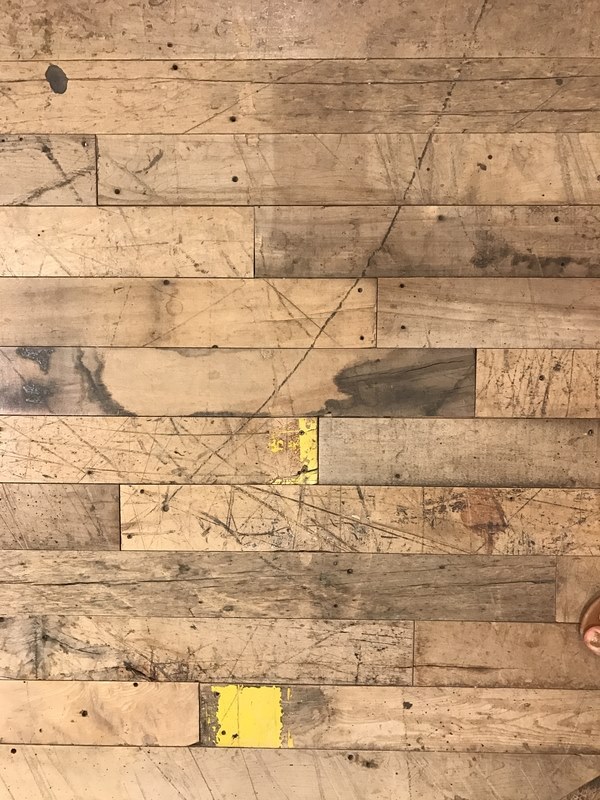
A wooden floor should always be kept in good shape if they’re to serve their purposes, especially the aesthetics of the house. Over time, the wood from which the floors are made may get worn out or damaged after prolonged use. However, knowing the right time to restore the wooden floor is basically relative. Each homeowner has their own time when they think their wooden floor should be restored. But then the right question that anyone should ask himself/ herself the question of whether it’s the right time to carry out the restoration of the floor. Here are the typical signs that would indicate that your wooden floor needs to be restored:
1. When it has a lot of Scratches
If you notice that your wooden floor has lots of scratches on it, it may be an indication that you need to do a restoration. This is especially necessary when the scratches have begun to wear out through the stains of the floor. If the stain of your floor is the darker one, these scratches will tend to be more obvious. However, if there are only a few minor scratches, it’s normal and doesn’t require any restoration to be done. Your concern should be when you notice unsightly scratches that are located areas that aren’t covered.
2. When you Notice some Boards Turning Grey
When you realise that your wooden floors are turning grey, it could be an indication that it needs restoration. This is an indication that there’s an urgent need for refinishing to be carried out. The turning grey of the boards is a sign that any further delay in refinishing the floor could lead to permanent damage. Therefore, if you wait longer, the chances that you’ll need complete replacement of the floor are very high. The wood of the floor often begins to absorb water once the polyurethane is worn off. The source of this water may be pet’s paws, rain, cleaning product or spilt drinks.
3. When Boards Begin to Turn Black
The moment some floorboards begin to turn black, it may be already too late to restore the boards affected. Therefore, once you notice any boards turning black in some areas, you need to respond quickly by refinishing the floor of your house. These black stains may be as a result of water damage or pet stains. Once this point is reached, there are two options to restore the wooden floor. The first option is to stain the floor so dark that the stains are camouflaged. The second one is to replace the boards that are stained with new ones.
4. When there’s Extensive Moisture or Water Damage
When there’s major water or moisture damage on the boards, dark areas will be formed on them as well as cupping and/ or separation of the boards may occur. This could be resulting from a water heater that’s been broken, flood, ice damning and many more other sources of moisture or water in the house. When this is observed, there’s a need for urgent restoration and refinishing to be done.
5. Discolouration and/ or Fading due Sunlight
When there’s sun damage as a result of UV rays, refinishing the floors may be necessary. The sunrays cause the wooden floors to have an unhealthy appearance and become discoloured. You can refinish or sand the discoloured or faded areas. This is because either of the restoration procedures helps in the removal of the top layer. After this, you can go ahead and apply a new stain.
A floor primer coat is a recommendation for nearly all projects of painting. So, irrespective of the kind of painting task at hand whether its metal, wood or drywall, application of a primer coat is very vital. Ideally, a floor primer is a flat, sticky paint that’s meant to adhere onto a surface well. The primer also serves to give a consistent base for topcoats of paints. Hence, if you don’t prepare your surface before priming, there’s the likelihood that the paint may not stick properly, and you may need more coats for you to get adequate coverage. Primers are designed for different surfaces. So Wooden floor primers are essential for wooden floor restoration and in. Here, we explore the application of the wooden floor primer.
When you apply a wooden floor primer on the surface of a newly built wooden floor, the primer helps to seal the wood ensuring that they don’t get soaked with paint when it’s applied. Soaking the wooden floor may require extra costs to deal with. Primer is helpful in preventing bleed-throughs from natural blemishes like knots and colouring of bare wooden surfaces. There are also primers with abilities to block stains which make them very useful for sealing discolouration such as sealing over the mould. This ensures that these blemishes don’t appear through the coats when the painting is complete. When the wooden floor primer is applied, it helps to ensure that there’s proper bonding of the painting job that has been done.
Though the usual colour of the paint is white, however, other neutral colours of primer are also available. The reason for the major single white colour or neutral colour of primer is to ensure that the surface shows true paint colours. Though some primer manufacturers will add some amount of pigment to the primer to make it more like the paint colour you want to use, there’s usually no need for colouring it. However, the addition of the pigment can come in handy if the final paint colour is lighter than the original surface colour.
The major types of primers available include oil-based, water-based and paint-and-primer-in-one. Let’s take a brief look at these types before we get to how to use your wooden floor primer on your hardwood floor:
These are normally used for surfaces that can easily be touched like cabinets, windows or doors. For clean up and thinning, these primer types require mineral spirits. They’re great for sealing over surfaces of wood that are often very problematic.
They’re also referred to as latex primers. They’re very suitable for blocking of stains. They’re recommended for use on wooden surfaces or dry walls.
This uses a single coat to cover and seal surfaces.
How to Use Wooden Floor Primer
The way to use the primer on the surface is rather simple. To do this job in the simplest way possible, look for an extension pole and use it to roll your primer on the wooden floor. This method is quicker and much more comfortable and easier to use. It’s a good idea to start into chunks of the floor measuring four square feet. After applying the primer to each area, let it dry thoroughly. The amount of time to let the primer dry is specific to the primer’s manufacturer. Often, the duration ranges from around half an hour to about four hours.
Application of the wooden floor primer is very vital if you want your wooden floor to stay presentable for longer. You should, therefore, know the type of primer that’s most appropriate for you and apply it using the simple method described above.
Refinishing your hardwood floor can really give a room a new lease of life, adding a sense of brightness and sophistication by removing the scuffs and dirt that may have built up over the years. Doing so can be a fairly labour intensive process though, so it’s important to make sure you know what you’re doing before you start.
Once you’ve read this article, you should be fully prepared to start sanding down your hardwood floor.
As with almost all DIY jobs, preparation is key. Sanding is a very dusty and noisy job, so it’s important to make sure you don’t make a total mess of your house!
Make sure you cover and mask around any doors (to prevent sanded dust spreading to the rest of the house) and wear protective clothing yourself (including a mask over your mouth and nose). It’s also a good idea to open any windows, so that you’re working in a well-ventilated area, as breathing in the dust particles can be harmful to health.
Finally, check over the floor to make sure that there are no protruding nails which could tear the sandpaper or damage the drum sander as you’re running it over the wood.
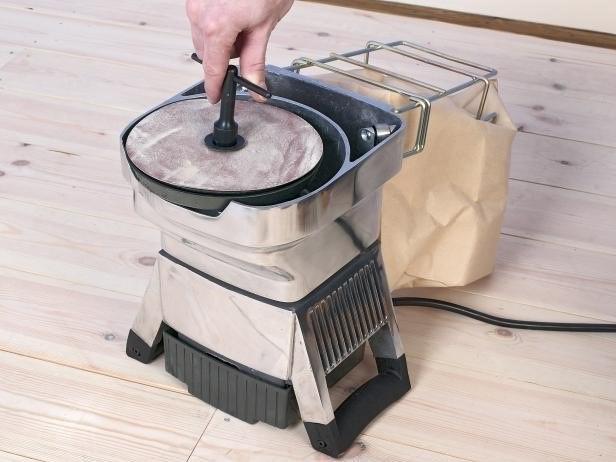
You’ll actually require three types of sander: a heavy-duty drum sander, heavy-duty edging sander, and a corner sander. Each type of sander will require its own specific type of sandpaper, so make sure you also get the right paper for each tool. When you hire your floor sanders, your hire support will be able to offer your guidance with acquiring the correct sandpaper.
It’s important to make sure the sander is unplugged before securing the sandpaper. Once this is done, simply unscrew the retaining strip, then feed a strip of sandpaper underneath it. Feed the sandpaper around the drum, and then secure the end under the retaining strip, ensuring the cut sections are aligned with the retaining screws. Before tightening the retaining screws, ensure that the paper is taut and correctly positioned.
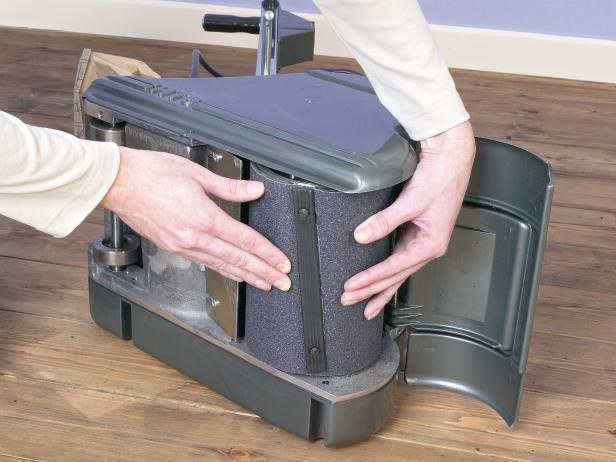
In terms of choosing sandpaper, if the floor is in a bad condition, start with rougher 40-git paper. If the floor’s in a better condition, you can use a finer sand paper instead. Once all this is done, you can plug in the sander, tilt it back so the drum is off the floor, and start it up.
Lower the drum onto the floor, and begin to move the machine diagonally across the room. Once you’ve made one run change direction and make another set of diagonal runs at a right angle to the first run. Finally, change direction again and run the machine down the grain of the wood.
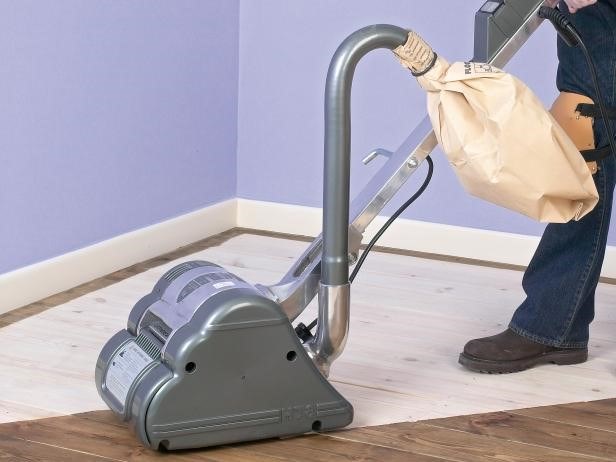
Make sure you move at a gradual, even pace in order to create an even finish. Once you’ve finished this, you’ll have done the main body of the floor, and there are only the edges and corners left!
Like with the drum sander, make sure the edge sander is unplugged before replacing the old disc of sandpaper. To remove the old disc, use the bolt key supplied to undo the retaining bolt (this key can often be found on a retaining clip on the underside of the sander).
Position a new disc of sandpaper, then retighten the bolt, making sure the retaining bolt is well below the sandpaper surface level. Once this is done, you’re ready to run the sander down the edges of the room. Make sure you use a finer grain sandpaper for the edge sander because you’ll be sanding across the grain.
Changing the sandpaper on the corner sander is simple, just take a hold of the old piece of sandpaper and tear it off.
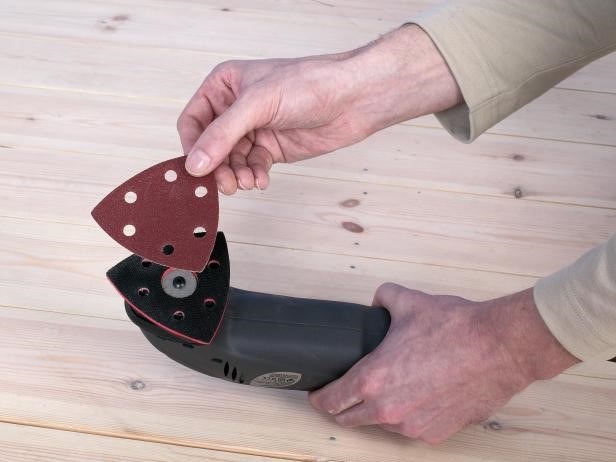
Take a new piece of sandpaper and align the pad before pressing it down. Once this is done, you can use the sander to sand the room’s corners, or any other had to reach areas (such as around a radiator).
Once you’re happy the whole floor has been sanded, sweep up any dust and debris that hasn’t been picked up by the sanders’ dust bags. Finally, wipe the floor down with a damp cloth. If you find any rough areas whilst doing this, just sand them by hand.
You’re now ready to apply the varnish to the floor. You can apply two coats of water-based varnish in a day, given how quickly it dries, although you’ll need to do some light sanding in between. Then your floor will be finished, and you can step back and admire your work!
We hope you found this information useful – let us know via Facebook or Twitter what you’d like to learn more about, or what you found most interesting!
Copyright © 2026. Floor Sander Hire All Rights Reserved. Website & SEO by Loop Digital.