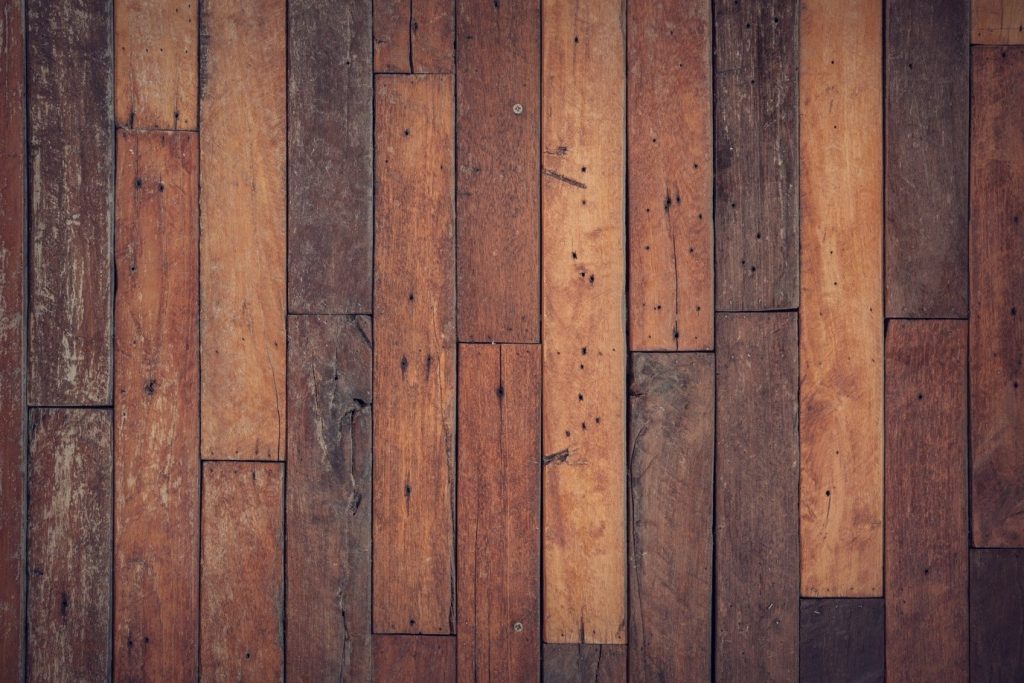
In recent housing constructions, use of wood has become increasingly a favoured choice. There are a few reasons behind why constructors prefer hardwood flooring than cemented or tiled floors. These are:

So how long does it take to refinish a hardwood floor once it gets damaged?
Once you have ensured you have all the finishes and floor sanding accessories required for the job, you’re ready to go.
First of all, refinishing a hardwood floor requires the contractor to move household items to and from. Most probably you will be forced to stay somewhere else as the work goes on. So, it is best to plan for the refinishing while on holiday or just check the house before you decide to start moving your things in.
There are three major factors influencing the duration taken to refinish.
There are two types of polyurethane used to make hardwood floors. Water-based polyurethane and the oil-based polyurethane. Water-based polyurethane takes a short amount to dry but the disadvantage to this is that the finishing won’t be durable as you had hoped. Oil-based takes more time to dry, approximately 4 days until it is completely dry, coating by coating. Sanding may also be required to be redone in cases where the there is more damage to the wooden floor.
A bigger house equals time to refinish the hardwood floor. Also, a bigger house suggests more furniture to move thereby adding to the waiting period. Even after the floors have been refinished, they will require an additional time to dry up before you can restore their uses.
There are two aspects of time to be considered. One is the season in which you are doing the refinishing. In a rainy season, the air is very humid due to the rain. The humidity slows down the drying process of the stain for each of the coats on the hardwood floor, causing you to wait a long time till it is completely dried. Two, every hardwood floor is made up of coats. While refinishing, each coat is required to be dry in order to go to the next coat
layer on the hardwood floor.
On average minimum at least 3 full days are required for the refinishing to be complete.
So, it is best to plan very early if you are considering refinishing your house. If you found some valuable info on this guide, let us know! If you have any further questions, please do feel free to give us a call on or fill out our contact form.
Floor sanding sheets or sand papers are papers with abrasive materials glued on one side or on one face. Although they can be replaced by other abrasives like aluminium oxide paper and silicon carbide paper which should be used to describe the type of paper you need.
They come in different grit sizes and are used to remove stains from surfaces, make them smoother for painting or wood finishing, to make surfaces rougher in preparation for gluing and for removing layers of materials like old paints.
The size of the grit is usually stated as a number with the smallest indicating the coarse grit whilst the largest indicating the finest grit.
How Many Sanding Sheets do I Need?
People have different tastes for home designs, which vary from modern to natural. The design or style of choice should improve the overall design and add a natural impression to your home. However, the budget becomes the first priority for the type of floor you want.
Thus, the question how many sanding sheets for a floor sander job? However, this is a very tricky question to answer, because the answer will depend on the condition the floor is in and the size of the surface area.
For instance, if the floor is in a bad state or old you may need to start with a coarser sandpaper to sand down to the original floor.
If you have an average size floor that is slightly worn out, you may start sanding the floor with a 36-grit paper to remove stains on the top layer, paint and then wax. For you to ensure that there are no stains left on the floor you will need an extremely coarse sandpaper for you to get down to the original floor.
To get a really nice smooth finish, you have to sand the floor with a 60-grit paper, 100 and a 120-grit paper. Since the paper wears out so quickly and becomes ineffective in giving a nice finish, it is important to consider buying 36, 60, 100 and 120 grit papers in large quantities.
For one to get a smooth finish you may need to replace the sandpaper more often. The unused papers can be taken back to the hardware for reselling.

However, there is no specified guideline for the number of sanding sheets you may need for a floor sander job. The number of sanding sheet will depend on the size and extent of damage of the floor, but the following can be a rough estimate for a standard size room that is not so old or extremely worn out.
So once you’ve understood what grit paper you will need, what follows is the standard amount of sanding sheets you’ll need for each sized grit paper, for a standard sized room:
36 grit paper – 15 sanding sheets
60 grit paper – 10 sanding sheets
100 grit paper – 10 sanding sheets and
120 grit paper – 5 sanding sheets
You will need more of coarse papers since they are used to remove old stains from the floor and they do most of the sanding work and just a few of grit 60, 100 and 120 since they are used for obtaining a smooth surface.
We hope you’ve found this information insightful, if you have any questions please do feel free to give us a call us with 020 8427 6604 or by filling in our contact form.
In the interest of saving money, you may opt to sand your own pine floors. All this requires is the hire of the high-quality tools that we supply here a The Floor Sander Hire Co. Some of the companies you hire in to do the job may only be interested in the pay. However, sanding pine floors does not always have to be an expert-only job. With time you’ll benefit from the importance of doing this job for yourself. You save some money and the quality of work you do is better. Though most floors are made of hardwood, pine is a soft wood. The procedure used for sanding softwood floors is not the same as the one for hardwood floors. A gentle and soft touch is a very important consideration when doing this job. An electric sanding machine is the best choice if you want to complete the work quickly, though doing it by hand is still an alternative.

What you will need
In order to be able to do your floor sanding work satisfactorily, you will need the following equipment:
Procedure
There you have it! Though it may be time-consuming, sanding pine floors is an activity that will save you a lot of money. Furthermore, you do it out of the love for your own floor. Therefore, if you’ve been debating about it, follow this procedure and you’ll not go wrong. You will definitely begin enjoying it.
Looking after your furniture, flooring, or anything else in your house made of wood is important if you want it to last. This especially goes for anything wooden you own outside. Wooden garden furniture, decking, or a wooden gazebo will especially need staining in order to protect it from the rain.
But before staining anything wooden, you’ll need to prepare it. Preparation is key to ensuring that, when you apply the stain, it seeps into the wood properly and evenly, providing the best protection. Luckily, we’ve done the hard work for you and compiled a guide to preparing wood for staining. So read on to become an expert!
This is a bit of a controversial question in some ways, and you might get different answers from different carpenters. The long and the short of it, however, is that using power tools means you’ll get the job done a lot quicker. This especially goes for if you are sanding large surfaces like decking or a whole gazebo.
With big projects like this, it’s a good idea to hire some heavy machinery, but, if you’re just sanding down some furniture, you can purchase or hire a palm sander. This will certainly get the job done quickly and easily.
What we do recommend, however, is that you hand sand at the end to provide a fine and smooth finish to the wood. Wrap some fine grain sandpaper around a block and sand down the wood one last time to get a great finish.
It’s a good idea to go into some more detail about how to best sand down wood if you’re preparing it for staining. First off, it’s time to bust some jargon and explain what different grits mean. A sandpaper with a coarse grit (those under 100) will be quite rough. These are generally used at the start of the sanding process to remove a large amount of wood.
However, sand paper under 100 grits doesn’t provide a smooth finish, so afterwards you should use a finer grit paper to smooth out the wood. Then, finally, use a fine grit sand paper (say over 200) in order to finish the job.
You should also make sure that you sand with the grain, never at an angle to it. If you don’t you’ll end up scratching the wood and this can end up looking terrible!
Once you’ve sanded down the wood, you’ll need to make sure you remove all of the sand before you get on with the staining. You can use a damp rag to do this, but the best option is to purchase some sticky cheesecloth which is designed for cleaning dust from sanded wood.
Once you have cleared away all the dust, it’s time to start staining the wood! If you follow this guide, you’ll be able to apply the stain safe in the knowledge that the finished product will look great and, most importantly, protect your wood from the elements.
We hope this blog gave you some food for thought, let us know on our Twitter or Facebook – we’d love to hear your thoughts!
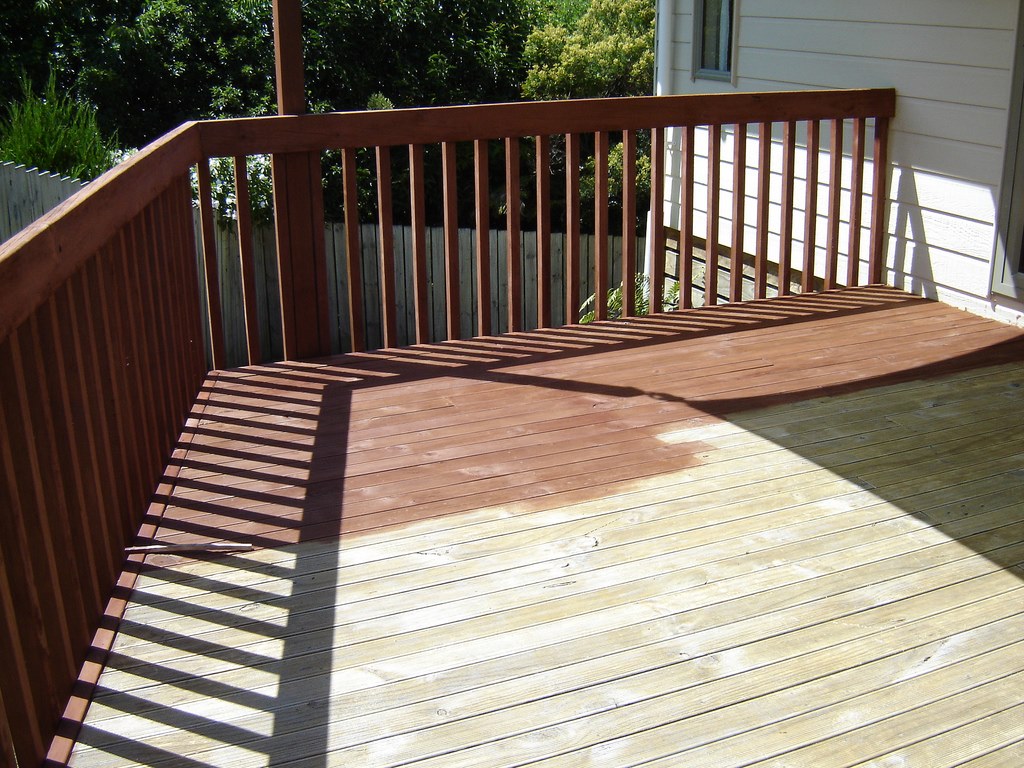
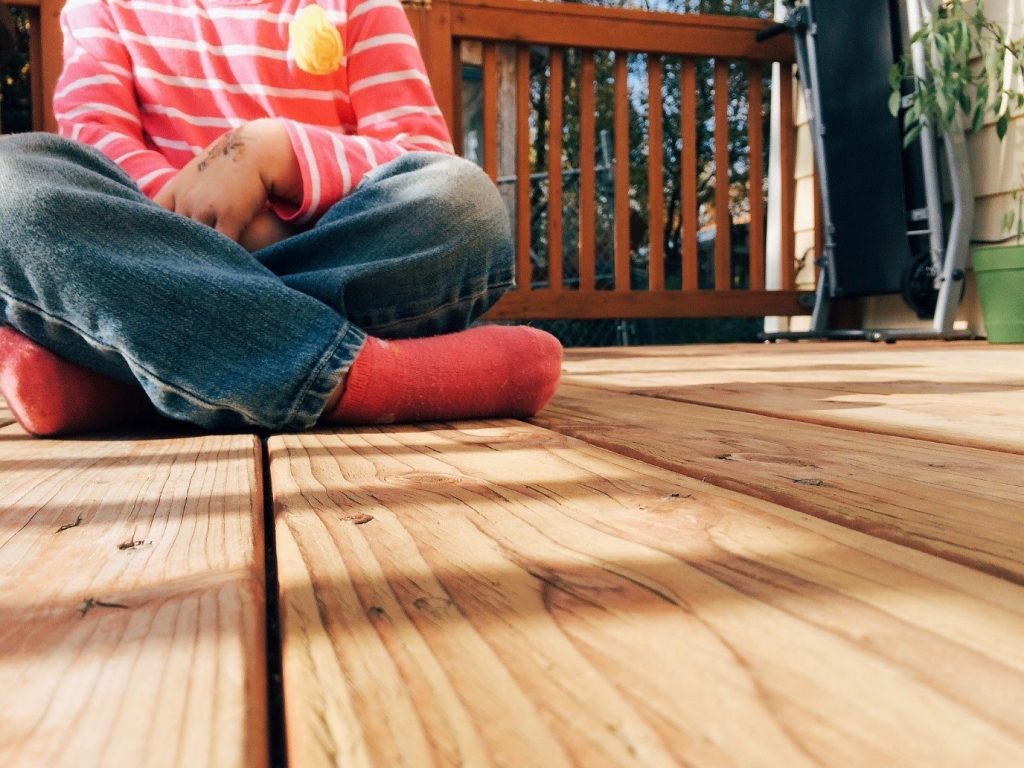
Spring has sprung, and fortunately, that means we’ll be spending a lot more time outdoors in our gardens. Many people will be spending this time on a wooden deck, overlooking their gardens whilst reading, or enjoying a barbeque. But the winter weather may have taken its toll on your decking, leaving it looking dirty, grey, and uninviting. Fortunately, it’s possible to breathe new life into it by sanding it down and retreating it.
But how exactly can you go about this, and can you use a floor sander to do it?
These questions and more shall be answered in the article below!
The short answer to the title of this post is: it depends. There’s a lot of competing views on whether or not floor sanders can be used to sand your deck, with valid arguments on both sides. But, realistically, it isn’t the best way to go about sanding down your deck. We’re going to go through the best way to prepare your deck for re-varnishing, before explaining how you could use a floor sander if that’s all you have to hand.
It’s important to clean your deck thoroughly before sanding it down. Use a jet wash to clean off as much grime as possible. But be careful, if your deck is made of a soft wood like pine, spruce, or cedar, you’ll want to make sure you don’t damage the wood. Make sure you use a wide fan and don’t hold the nozzle too close to the deck.
After this, if the decking has a lot of old product still on it, you’ll need to use a paint or stain remover to take this off. But don’t use anything too harsh, otherwise you might damage the wood itself!
You’ll want to make sure you choose a day on which there is very little chance of rain. If the wood gets wet after it’s been sanded, but not before it’s been stained or painted, then you’ll have to start all over again, and no one wants that!
When it comes to sanding tools, the best way to sand down your deck is to use a hand-held belt sander. Although many people will be tempted to use a floor sander, these have a number of shortcomings, including their size and weight (which could damage your deck), and the fact they can only sand perfectly flat surfaces. Most decks will have a slight curve in them, so a floor sander just won’t do the job.
Make sure you use proper safety gear as well. A respirator is a must, as well as eyewear. Start with a bet sander with a heavy grit belt (around 50) and work your way along the boards. Then, use a palm sander to get those bits the belt sander couldn’t reach. Finally, repeat this process with a lighter grit sandpaper in order to get a smooth surface.
Use a leaf blower, or broom to remove any of the dust you’ve left after sanding the deck down. It’s important to know that clear coats of stain give very little protection. They’re also very thin, so you’d have to reapply them a lot more frequently. For large surfaces like a deck, you’re going to need a solid stain or paint in order to protect it. It’s also important to use a proper stain brush to make sure the coat on the deck is even, and it works its way into the wood.
It is possible to use a floor sander to sand your deck, although we still advise you to use a hand-held belt sander for best results. The steps for sanding with a floor sander are very similar to the ones described above, except you replace the step using the belt sander with using the floor sander. Again, start with a heavy grit sandpaper and gradually move to a finer one to get a smoother finish. Just make sure to go slow and steady to get an even finish, and make sure all parts of the deck have been sanded down. Then continue the steps as usual!
We hope you found this information useful – let us know via Facebook or Twitter what you’d like to learn more about, or what you found most interesting!
Hardwood is the king of domestic flooring and a personal favourite of ours. Not only is it is durable and hygienic, but it looks simply gorgeous, with the power to accentuate natural décor and raise the value of your property.
But the appeal of your hardwood flooring can be ruined by letting it succumb to scuffs, scratches and general wear and tear. So, to keep your floor looking its best, it is advised you treat it with regular sanding and varnishing.

All types of flooring lose their flair over time, becoming dull from wear and tear. One of the biggest benefits of hardwood flooring is that, when it starts to look dull, you can simply sand away the dull layer and reveal a fresh one.
This layer makes the hardwood look like new again, giving it a smoother appearance. The new layer also allows easy applications of different aftercare products to extend the life of the flooring.
On top of a shinier appearance for your floor, your hardwood also does wonders for the surrounding area. The smoother your floor is, the more reflective it will become. A well-maintained floor can effectively reflect light and spread it around to brighten up any room.
Regularly sanding your floor means that you can keep it as even as possible, which makes fitting furniture much easier. Level flooring also makes it less prone to collecting dust and other debris and reduces the chances of suffering from a slip or fall within your home.
After every treatment with a sander, your hardwood floorings resistance to movement will decrease more and more – preventing the build-up of dust. This helps your floor stay much fresher over time, and reduces the amount of tedious cleaning your flooring will need in the future.
Unlike carpets and rugs, you can reinforce hardwood flooring with a variety of effective varnishes and lacquers that protect it against moisture and unwanted drafts.
Refinishing your hardwood floor can really give a room a new lease of life, adding a sense of brightness and sophistication by removing the scuffs and dirt that may have built up over the years. Doing so can be a fairly labour intensive process though, so it’s important to make sure you know what you’re doing before you start.
Once you’ve read this article, you should be fully prepared to start sanding down your hardwood floor.
As with almost all DIY jobs, preparation is key. Sanding is a very dusty and noisy job, so it’s important to make sure you don’t make a total mess of your house!
Make sure you cover and mask around any doors (to prevent sanded dust spreading to the rest of the house) and wear protective clothing yourself (including a mask over your mouth and nose). It’s also a good idea to open any windows, so that you’re working in a well-ventilated area, as breathing in the dust particles can be harmful to health.
Finally, check over the floor to make sure that there are no protruding nails which could tear the sandpaper or damage the drum sander as you’re running it over the wood.
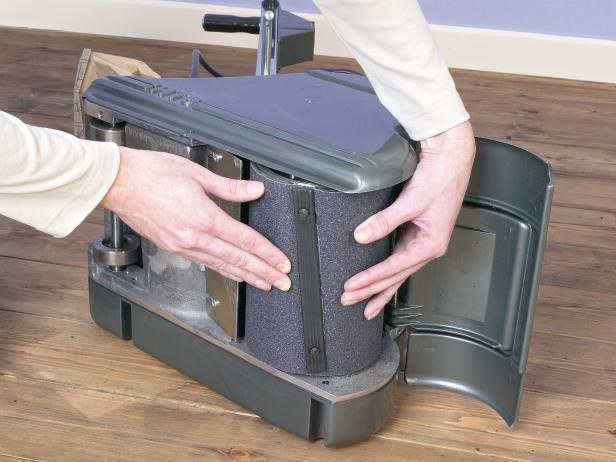
You’ll actually require three types of sander: a heavy-duty drum sander, heavy-duty edging sander, and a corner sander. Each type of sander will require its own specific type of sandpaper, so make sure you also get the right paper for each tool. When you hire your floor sanders, your hire support will be able to offer your guidance with acquiring the correct sandpaper.
It’s important to make sure the sander is unplugged before securing the sandpaper. Once this is done, simply unscrew the retaining strip, then feed a strip of sandpaper underneath it. Feed the sandpaper around the drum, and then secure the end under the retaining strip, ensuring the cut sections are aligned with the retaining screws. Before tightening the retaining screws, ensure that the paper is taut and correctly positioned.
In terms of choosing sandpaper, if the floor is in a bad condition, start with rougher 40-git paper. If the floor’s in a better condition, you can use a finer sand paper instead. Once all this is done, you can plug in the sander, tilt it back so the drum is off the floor, and start it up.
Lower the drum onto the floor, and begin to move the machine diagonally across the room. Once you’ve made one run change direction and make another set of diagonal runs at a right angle to the first run. Finally, change direction again and run the machine down the grain of the wood.
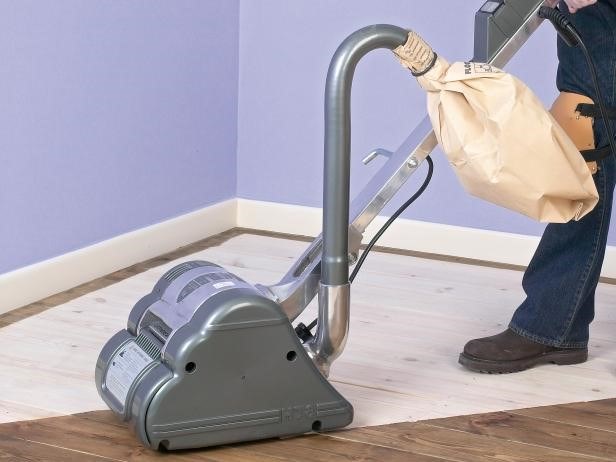
Make sure you move at a gradual, even pace in order to create an even finish. Once you’ve finished this, you’ll have done the main body of the floor, and there are only the edges and corners left!
Like with the drum sander, make sure the edge sander is unplugged before replacing the old disc of sandpaper. To remove the old disc, use the bolt key supplied to undo the retaining bolt (this key can often be found on a retaining clip on the underside of the sander).
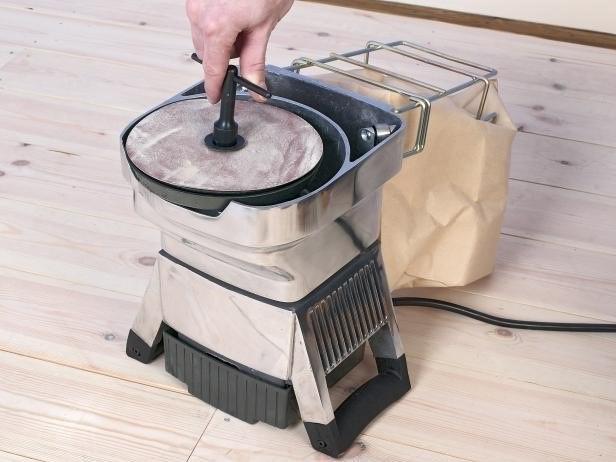
Position a new disc of sandpaper, then retighten the bolt, making sure the retaining bolt is well below the sandpaper surface level. Once this is done, you’re ready to run the sander down the edges of the room. Make sure you use a finer grain sandpaper for the edge sander because you’ll be sanding across the grain.
Changing the sandpaper on the corner sander is simple, just take a hold of the old piece of sandpaper and tear it off.
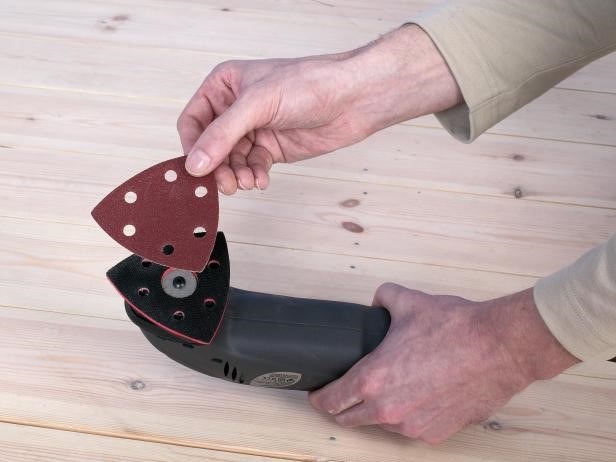
Take a new piece of sandpaper and align the pad before pressing it down. Once this is done, you can use the sander to sand the room’s corners, or any other had to reach areas (such as around a radiator).
Once you’re happy the whole floor has been sanded, sweep up any dust and debris that hasn’t been picked up by the sanders’ dust bags. Finally, wipe the floor down with a damp cloth. If you find any rough areas whilst doing this, just sand them by hand.
You’re now ready to apply the varnish to the floor. You can apply two coats of water-based varnish in a day, given how quickly it dries, although you’ll need to do some light sanding in between. Then your floor will be finished, and you can step back and admire your work!
We hope you found this information useful – let us know via Facebook or Twitter what you’d like to learn more about, or what you found most interesting!
Maintenance of newly sanded floor is a task requiring the right types of materials, equipment, trained personnel – as well as a practical maintenance plan. Periodical maintenance helps keep your wood floor in newly sanded condition, while preventive maintenance is useful for avoiding any sort of damages to the floor from accidental damage. Knowledge of sanded floor characteristics helps in adopting the right maintenance method by using the best of floor-friendly cleaning agents.
Hiring professional-standard floor sanders can help simplify your floor maintenance, and with our friendly staff here to support you, we can help ensure your sanding is perfectly executed. Since we have been in the professional floor sanding business for several years, our qualified staff have all the experience and know-how to give you all the advice you need to get the best results, and even extend your floor life – and recommend the best quality accessories and materials for maintaining your hardwood floor.
There are lots of little tricks that you can use to up the value of your home, or property that you are investing in, but an immediate hit with prospective buyers is flooring.
It can be the difference between zero interest and a high-end offer, so it’s important that you keep your flooring well maintained. Because it’s a present factor in every room of any house, and the fact it affects the appearance of everything else in proximity, a shabby floor could leave property buyers turned off.
If you’re reading this and don’t already have hardwood flooring in your home, you owe it to yourself to fit it as soon as you can. Hardwood flooring is highly desirable because of its easy-clean finish, timeless appeal and smooth appearance.
With hardwood flooring, you can easily fit underfoot heating systems, plus the timber retains heat much more effectively than with other materials. What was once considered something exclusively for the wealthy, is now readily accessible thanks to modern means of production. Today, anybody can install hardwood flooring in their homes with ease, and without necessarily breaking the bank.
Even if the potential buyer doesn’t like hardwood flooring, it’s still preferable to a home with wall-to-wall carpeting because it holds a great deal of options to the buyer.
If they want to fit a carpet with a colour and pattern that suits them, then they’re free to simply place it above the hardwood, as opposed to ripping up dull carpeting and replacing it.
All flooring is going to show wear and tear over time, and spilling drinks or plates of food is going to leave nasty stains. One of the other amazing perks of having hardwood flooring is that you can maintain its gorgeous aesthetic by utilising an electric dust-free sander.
The top layer of hardwood flooring will inevitably lose its shine over time, but with a quick sanding from a high-quality electric sander, you can clear away the dull top layer to reveal another layer underneath that will look good as new.
You can even time your sanding to coincide with a viewing of your property to show how well you care for and maintain the residency, so you can really impress your potential buyers. You won’t want to constantly be sanding your hardwood floor, though, so it’s always a good idea to treat your floor with aftercare products once you’ve finished the sanding process.
There are many types of aftercare products available, such as acrylic floor lacquer or gap filler, which can help the hardwood stay smoother for longer, boost its water-resistant qualities, or simply offer a more noticeable sheen.
Well-maintained hardwood flooring could become the primary selling point of your home. The versatility of wood flooring and the potential to keep it looking amazing for many years with little effort helps make any home highly desirable.
Floor Sanders London carries a comprehensive range of hardwood sanders for hire, plus a plethora of aftercare products that will keep your flooring strong and attractive for many years. Browse our site for a full list of the products we offer.
Copyright © 2026. Floor Sander Hire All Rights Reserved. Website & SEO by Loop Digital.