After learning to clean your hardwood floors correctly, it will only be something you wish you’d known sooner, with how simple it is. However, it is important not to get caught up in misinformation spread online, which will result in your beautiful flooring being damaged. Whether your floor is brand new or has been installed for years, it is important to make sure you continually take care of it so that it maintains its fresh look.
Using the wrong cleaning products or not keeping on top of your cleaning routine can result in a buildup of dust, debris, and dirt that are regularly brought into our homes from the outside. When this build-up is accumulated, not only will this show in the appearance of your hardwood floors but can also cause damage to the finish. So, to ensure your floor has a natural shine all year round, what exactly should you do?
The process of cleaning hardwood floors is relatively easy. This can be accomplished using a mild detergent. You can readily purchase hardwood floor cleaning solution products or use a diluted pH-neutral soap such as washing up liquid.
Although your first instinct may be to turn to use a mop and bucket, this will eventually lead to damage to your hardwood flooring. When too much moisture interacts with your flooring, you may notice a wavy or rippled appearance. This is known as ‘cupping’, which although can be reversed, you will save yourself a lot of time and hassle if you take preventative measures first.
Now that you’re ready to start cleaning, before you begin, give your floor a vacuum and/or dust, which will loosen any dirt that may be hiding away between cracks. When it comes to the cleaning of your floorboards, you will want to use a damp mop or rag. Remember, never use a soaking bucket and mop. If you don’t wish to use a mop or rag, however, you can also purchase a wood floor spray mop kit, specifically designed to clean hardwood floors.
The product will spray your solution onto the floors directly, also taking away the inconvenience of you having to get down low on the floor to scrub! One top tip, regardless of if you use a mop or rag, is to allow your floors to dry while you clean another area. Don’t forget, too much liquid can be detrimental to hardwood flooring.
So, now you know what the dos and don’ts of cleaning your hardwood floor are, happy cleaning! Just be sure to steer clear of any homemade concoctions or DIY cleaning products that you may come across on the internet. An expert will always tell you that almond oil, wax, or apple cider vinegar are never the solution to a healthy hardwood floor!
For more intense and demanding issues please feel free to call us on 020 8427 6604 or contact us.
Sanding wood is easy, right? You just grab a piece of sandpaper and sand away all the rough and uneven surfaces…
There’s actually much more to it than that to ensure you achieve a professional sanding job every time.
Before you get into creating the professional sanding finish, there are a few things you’ll need to consider about the materials you’re using:
What kind of wood are you sanding?
The type of wood that you’re sanding will have a bearing on the type of sanding material that you need to use. Some wood, like pine or cedar, will sand much more easily as it’s softer, so you’ll need to use a lighter sanding material. Harder wood like maple or oak will require a coarser grit to sand effectively.
What effect are you going for?
You might be going for a modern, minimalist style, meaning you need a smooth surface. Shining a bright light against your wood or running a nylon sock over the surface after sanding will help you to pick up any imperfections.
Equally though, you might be looking at shabby chic – in which case, some bumps might add to your effect.
Remember that coarse grit in your sander will remove more of the wood’s surface, whereas a finer grit might leave some of those larger dints.
Why do you need to sand your wood?
Are you sanding the wood because it’s old and needs a new look? Do you want to repaint, but there’s too much varnish on there, or is it new wood that you need to shape to create something? Typically, older wood will require a gentler hand, so a belt sander won’t be the best choice.
Working out how to complete the best sanding job can be confusing. You need to understand which tools work best for which projects to obtain the ultimate finish.
Sanding your wood makes it easier to paint, varnish, and refresh the design. It’s an essential part of upcycling that will ultimately make your furniture look new for longer.
We hope that our blog has been informative, please don’t hesitate to give us a call on 020 8427 6604 or head over to our contact page to fill in our online enquiry form.
Wooden flooring gives a beautiful finish to any room. It works well with modern designs to provide a minimalist feel, or with comfy farmhouse décor too. However, it is more delicate than carpet or tile and will need you to provide the proper care to keep it looking its best.
Spillages, marks, and scratches are bound to happen, especially if you have children or pets, so it’s important that you understand the right aftercare for your wooden flooring to stay on top of any issues. Water damage, cracks, or scratches will only get worse if you don’t fix them straight away.
To protect your floor from damage, you’ll need to apply some rules in your household.
To keep your floor looking shiny and new, you’ll need to understand how to maintain it properly and ensure you keep up with your care routine. Accidents happen but can be resolved more quickly if you constantly maintain the floor. It’s much more difficult to pull it back to perfection if you don’t continue the upkeep.
Depending on the type and colour of your wooden flooring, there may be items in your pantry that can help you maintain and provide the proper aftercare for wooden flooring.
Olive Oil and Baking Soda – After removing any dust or dirt from the floor surface, you could mix some baking soda with a couple of drops of olive oil until it makes a paste. Gently apply this to any areas of scratched flooring, leave for a few minutes, then buff away with a microfibre cloth. Your scratches should appear reduced.
Walnut Finish – The rich oil within walnuts can help disguise a scratched or marked wooden floor. Simply warm up the nut first (in your hand will do), then gentle rub on the affected area in a circular motion. This acts as a wood stain and will cure any visible blemishes.
Coconut Oil – Coconut oil is thick enough to fill cracks in its solid form. Rubbing a little into a larger crack, letting it dry, then buffing off the excess can help restore a smooth surface.
Wood Stain – Wood stain is a great idea to recover from any scuff marks. Gently sand away the affected area with fine sandpaper then conduct a patch test in an unseen area to ensure you have the right colour and finish. Remember, wood stains will dry slightly darker.
Once you’re confident that your damaged wooden flooring has been restored to its former glory, you should finish it with a water-based silicone polish to maintain its integrity and shine.
Contact us
We hope that our blog has been informative, please don’t hesitate to give us a call on 0208 427 6604 or head over to our contact page to fill in our online enquiry form.
You have spent thousands on a new wooden floor, and now its time to make that oh so important decision, which wooden floor finish do you use? Choosing the most appropriate finish for your wooden floor can be a daunting task.
The three most common wooden floor finishes are varnish, oil and wax. In order to make the right decision for you, you need a basic understanding of each finish; their advantages and disadvantages.
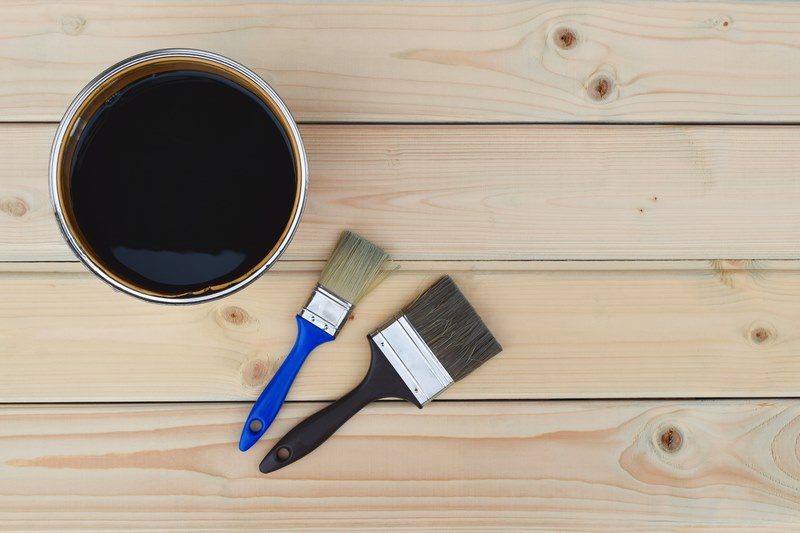
With their distinctive characteristics that bring out their advantages and disadvantages when applied on wood. Wax, varnish and oil finishes will continue to be used to polish wooden floors. The decision to choose which finish is most suitable, however, can be determined from these characteristics.
Thank you for reading our blog post. If you have any queries or wish to contact us, go to our contact page or call us today on 020 8427 6604.
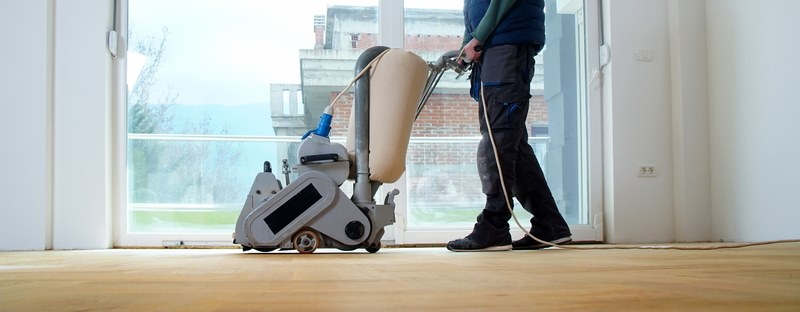
Any hardwood floor with serious problems like protrusions, discolouration and groove and pits can only be restored to its original glory through sanding. There are various types of floor sanders that one can use for this task. These are orbital sanders, edgers and drum sanders. Choosing the most appropriate of the three sanders is vital in ensuring that the completed work on your floor is outstanding. Of the three, the most effective type for most homeowners has been found out to be the drum sander. This is because it’s effective, irrespective of the condition of the floor. However, to achieve a great finish for your floor, the following tips and tricks are very vital in the process:
The drum sanders are very expensive pieces of equipment that most people may not want to buy for themselves. The main reason behind this is the fact that there’s only one job for this equipment; sanding down your wooden floor. The most cost-effective option is to hire one whenever you need it from rental centres and yards which usually have them for hire.
When renting the drum sander, ask the rental company to advise you on how much sandpaper you should purchase. So long as you have enough to do the job, there shouldn’t be a need for you to go and buy more paper during the project.
Ask the rental company to put your first Sandpaper on the Drum Sander for you It’s very likely that as a homeowner, you’re not familiar with the process of successfully putting sandpaper on the drum sander. So, ask the rental company to put the first one as you watch so that you can learn to do it yourself later.
Given that a drum sander weighs well over 100 pounds, it’s better for you not to attempt lifting it single-handedly. A rental company employee or a friend should help you get it into your carriage. The same help is also necessary for offloading the drum sander once you get home.
The only extension cords that you use on the drum sander should be those permitted by the manufacturer or the one attached to it. This is necessary to avoid fire resulting from the sander drawing too much power which can melt a power extension cord that isn’t of the proper size.
Use Safety Glasses, Hearing Protection, and Dust Mask even if you’re used to working without putting on safety equipment, sanding is a task that you shouldn’t do the same for. The dust bag doesn’t collect all the dust produced during the task. You must also make sure you have safety glasses on. When they hit nails, the drum sanders create sparks that can shoot into your eyes and cause harm to you.
Sand in the opposite direction to the motion of the drum, the drum sander is to be pulled and not pushed. This means that the motion of the drum is opposite that of how the drum sander is moved. Be careful and don’t get close to the walls, doors, trims baseboards and other such elements that aren’t sanded.
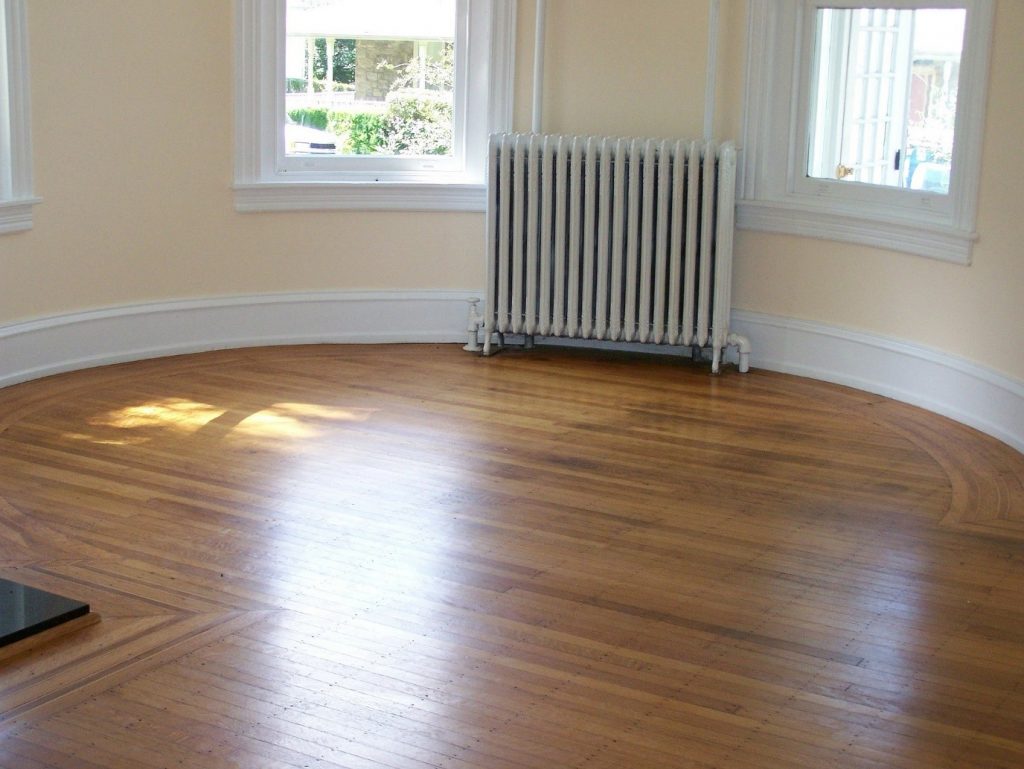
If you want your home to have that classic look then you will likely want to steer away from laminate flooring, this is why we are going through how to care for your for your hardwood floors to make them last a very long time!
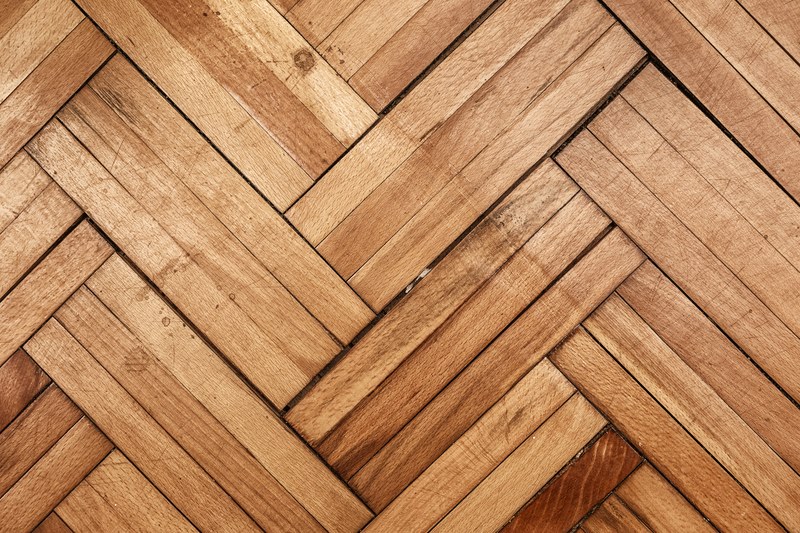
Wooden floors set the tone for a homey, rustic feel in your home. Whether you’re staying in a beach house or just lounging at the comfort of your own home, there’s something about wooden floors that give a touch of timelessness and a sense of relaxation and comfort.
Since wood is prone to wearing out, proper care is essential. Fortunately, there’s no need to worry because you can still achieve that natural appearance of unfinished wood with bona primer. Using this product will not require lots of preparations because it is quick and easy to apply — Bona primer dries quickly within two to three hours. Plus, it adds durability to your floors when paired with bona lacquer.
Bona primer is made of safe substances and ingredients. But in case of eye contact, rinsing with running water will do the trick. If the product spills onto your skin, just wash thoroughly with soap and water. Still, to avoid the risk of being exposed to such incidents, remember to wear appropriate protective equipment such as suitable gloves and safety eyewear when applying the Bona primer.
Before use, ensure that the product has reached room temperature. Shake the container thoroughly then insert the supplied filter. There’s no need to the dilute the Bona primer — just pour the finish into the supplied container through an external strainer to end up with a consistent lacquer finish.
Before applying the primer, make sure that the floor has been prepped. The surface of wooden floors to be treated should be sanded first to revert it to its bare form. It must be kept dry and should not be contaminated with wax, oil, sanding dust, and other materials. Once you’re all set, apply the Bona primer using a roller at approximately 10-12 square meters per litre to prevent product accumulation. Allow drying for about two to three hours.
Keep in mind that the final colour of the Bona primer is directly linked to the kind of wood it is applied to. Varying levels of tannic acid and other naturally occurring substances may be present in the same type of wood, which may affect the colouration. The more coats, the lighter the appearance of the wood. If only one coat is to be applied, sanding must be done after the first layer of topcoat. If two coats are to be applied, sand between coats of primer. Remove all dust afterwards. Take note that wood may swell when subjected to too much coating, so apply not more than two full coats of primer per day.
Once you’re done, keep the primer container tightly closed and store in a dry, cool, and well-ventilated area, away from heat and direct sunlight. The great thing is that if you feel like using the primer again in the future, you can still do so — the product’s shelf life is one year from the date of production indicated in its unopened original container.
Save yourself the trouble of caring for your wooden floors and use Bona primer to retain that natural, unfinished effect. Once you’ve achieved the desired coat, your wooden floors will easily exude warmth and cosiness, with the added touch of timeless appeal.
No you know what to do its time to do it! Contact us for all your equipment needs & we will happily give you some extra pointers.
Dust is almost always a major problem whenever we carry out sanding our floors at home. Whether it’s done by a professional or by you, dust is always a concern. Dust can be a health risk if inhaled in large quantities. Traditionally, dust masks have to be used to deal with the prevention of dust, causing health problems, especially with children.
Due to this concern, there has been a lot of research to try to find out how this dust can be dealt with once and for all. This has resulted in what’s known as dust free floor sanding. The main aim of this kind of sanding solution is to ensure that dust that results from the floors being sanded don’t get inhaled by the person doing the sanding job as well as those in the vicinity of the home such as children. The following are some of the facts to know about the process of dust free floor sanding:
It can be difficult to believe that it’s possible to sand your floor without any trace dust at all, even the slightest amount. However, this is quite a possibility.
The solution is provided by this machine or system that ensures that the dust is sucked into a container the moment it gets off the floor. Since the dust has the ability to get to any place in the house, including closed cabinets and covered interiors, thank goodness that someone found a way to contain the dust!
Now there are contractors that can do your floor sanding job without a trace of dust. There’s no need of dismantling or covering the interior of your house. Further, there won’t be any need for you to clean your house when the job is done.
The system involves the use of a sanding machine connected to a vacuum cleaner. These two systems combine to become a single system that’s completely sealed. The vacuum cleaner makes use of three stages to free the air from the dust. This dust is always the most stubborn thing to clean for homeowners when the home renovation is done.
Therefore, the vacuum cleaner captures the tiny particles of dust because they’re the most difficult to clean after sanding is completed. The bag into which the dust is fed may get full and need replacing, but there still won’t be any chance of the dust escaping. Therefore, this system guarantees a renovation of your floor in a completely dust-free manner.
This may all sound too good to be true but the fact is, it actually works close to 100% of the time. It’s actually just as good as it may sound. However, it will cost you, as a homeowner a bit more per square foot of your floor space but there’s a guarantee that it will deliver everything it promises.
Therefore it’s a wise move to give it a shot. Dust free floor sanding is the best option if you have items in your home that are sensitive to dust just as you are. Therefore, don’t hesitate to contact us if you’ve been looking for a better way to dust your floor.
Dust free floor sanding is no doubt the best method for doing any floor sanding task at home. Most of us loathe cleaning after the renovation is completed. Therefore, by choosing this kind of floor sanding option, you save yourself the hassle.
Floors are one of the most important features of every home. As one enters the house, steps are carved and mapped out into the floor that defines our individuality.
Because you walk, run, push and pull and drop all kinds of things on it every day, the flooring should be durable enough to withstand all kinds of pressure. One of the most long-lasting and resilient floors today is the wooden floor.
More and more people are switching to wooden floors for their homes. Wooden floors usually symbolize class and elegance. They have this natural-like finish that radiates an overall homey feel to your place. Wooden floors seem to orchestrate the other parts of the house into that total look that suits your taste. And they are basically easy to clean and maintain.
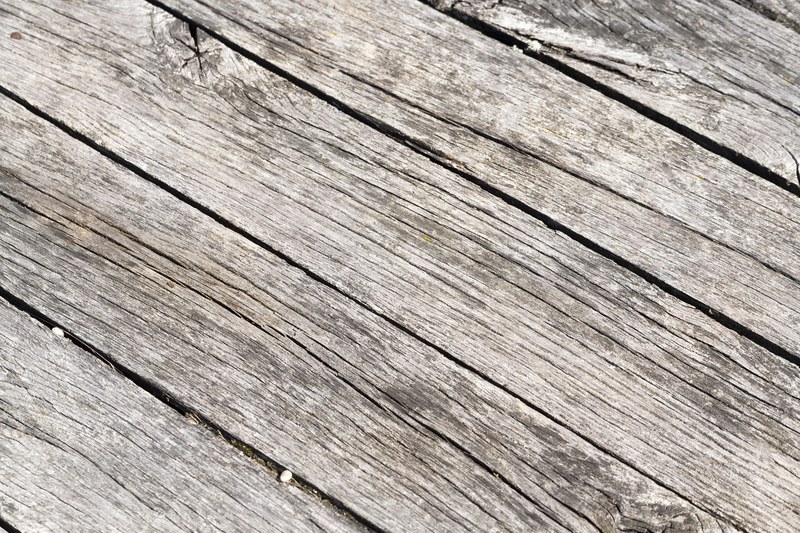
Aside from this, they can take the brunt of any force applied on it. But, as they say, no matter how seemingly indestructible your wooden floor is, it is still susceptible to certain damages.
Here are some of the most common types of wooden floor damages:
Let’s face it. Almost everything that passes through the floors can cause scratches on its beautiful and elegant surface. If left unnoticed, these scratches can become deeper and can cause a more permanent damage to your floor.
As wood ages, it becomes brittle. Whenever you drop something or move something heavy, cracks and dents eventually occur in wooden floors.
Stains can cause discolouration on a wooden floor. However, other people like to preserve stains instead of removing them because they say that stains mirror that sense of history or personality in a certain place.
When wood becomes soaked in water (say your house was flooded and you happened to have a wooden floor), it tends to warp and is eventually detached from the subfloor.
Gaps occur primarily because of a moisture problem. Too much moisture makes the wood shrink thus creating gaps in-between wood panels.
If you live in a place where it is damp and full of moisture, your wooden floor will develop moulds. This causes the destruction of your wooden floor.
Yes! Your favourite cat or dog can be a cause of damage to your wooden floor. Their pees can discolour and leave a very offensive smell in the wood itself.
There are also other wooden floor damages such as squeaky floors which are caused by improper subfloor installation; irregular wood flooring, burns, peeling of the wooden floor finish or varnish among others.
Despite these setbacks, wooden floors remain to be the fitting choice to bring together that ideal ambience of a certain space. This is the perfect material to outline the pathways of our everyday lives. The creases and stains bring with it unspoken memories and emotions that your wooden floor imprints each time you get out of your bed, put on your slippers and make that first step.
However, there is a basic way to fix most damages done on your wooden floor. It is called the Floor Sanding technique which is the process of removing the top surfaces of a wooden floor by sanding with rough materials. You can do this professionally yourself by hiring our quality floor sanders. Give us a call on 020 8427 6604 if you have any further questions, we are more than happy to help!
To find the most suitable kind of floor sander for the project that you wish to accomplish, sometimes it helps to explore the various types that are available on the market.
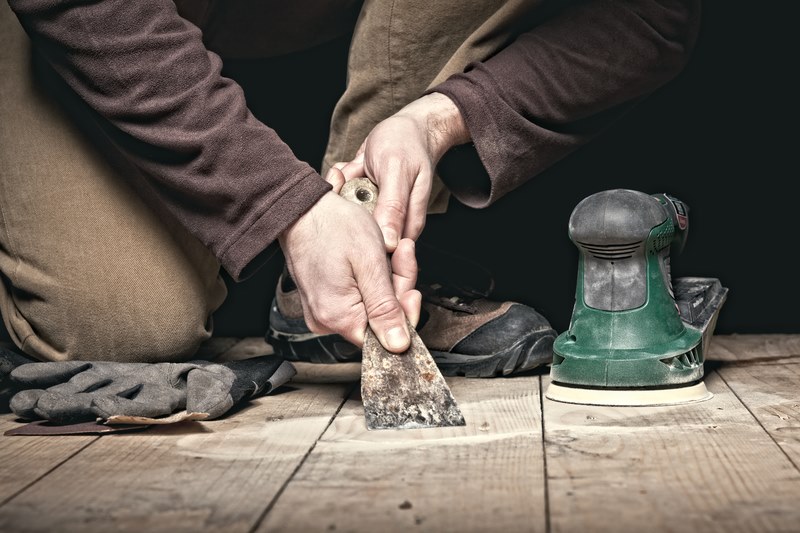
Starting with the smaller variations, the first type of floor sander to look into is the edging sander. These are usually used in tandem with other sanders for larger projects- like using edging tools in painting. For those harder to reach areas, you would use this smaller sander to get to the corners and other places that drum or orbital sanders would not be able to access. These are handheld devices, lightweight but still offering enough power to make sure that the wood has been stripped and smoothed and may work with orbital motion. These should not, however, be confused with orbital sanders- they are much more powerful and will be perfect for hardwood floor use but would not be advised for smaller projects that an orbital would be perfect for. As well, you would never want to use a lower orbital for edging.
The drum sander is the type that most people are familiar with. Usually designed with a rotational drum wrapped in paper, a drum sander is useful for large projects and is not readily available for sale. When renting a drum sander, you will also likely receive instruction on what grade paper to use, such as fine, medium and coarse grains. These are also easy to misjudge and scar up a flooring project, so it is always wise to make sure that you are very careful with use. This is usually your best choice when it comes to profoundly damaged floors, as it can often smooth out cracks and other rough areas and stains.
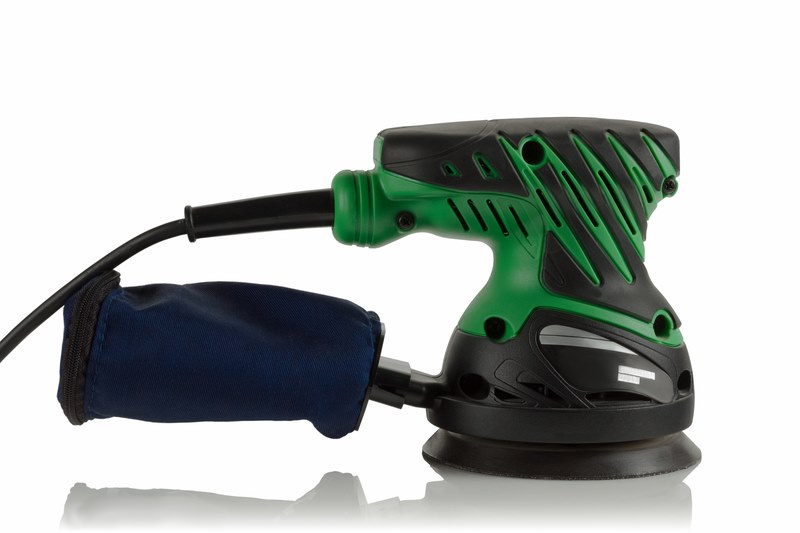
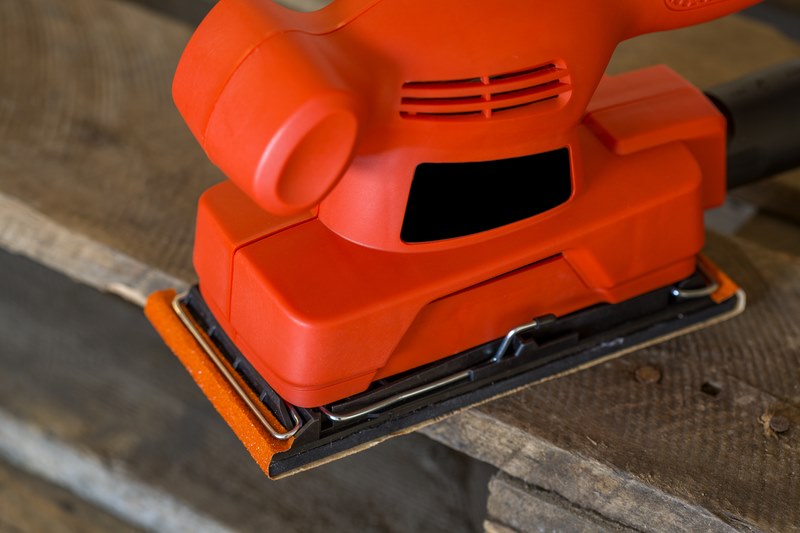
Square pad sanders are also handy tools. These are less powerful than a drum sander, and more comfortable for the do it yourself-er to manage. Though projects using these will take a little longer to complete, there is not as much risk of accidentally over sanding. Another option would be an orbital sander. Also, another excellent way for those who are redoing their flooring projects and need the wood stripped down. An orbital is a sander that will move in a circular form, and can usually be used regardless of the grain. Most of the sanders mentioned here carry some dust bag, which will have to be emptied here and there throughout the process of larger projects.
Sanders are all self-propelling, and so they take a little getting used to. Making sure that you remain in control of it is important, mainly if you are using a drum sander or similarly high-powered device. For this reason, choosing the larger sanders for flooring projects and keeping the smaller sanders, such as the handheld orbitals and the like for the smaller, furniture and other woodworking projects is essential. Choosing not only the right sander for your project but the right paper will enable you to create or refinish something beautifully.
We here at Floor Sanders London hope that our breakdown on what kind of sander is best for which situation was helpful. If you would like to learn more information about sanding wooden floors, then please Contact Us or call us on 020 8427 6604
A drum sander is a power tool that is generally usually used to sand flat surfaces, such as wooden floors. The cylindrical wheel (drum) has an abrasive material such as sandpaper attached to its surface, and the drum is moved at speed by an electric motor in order to sand the surface.
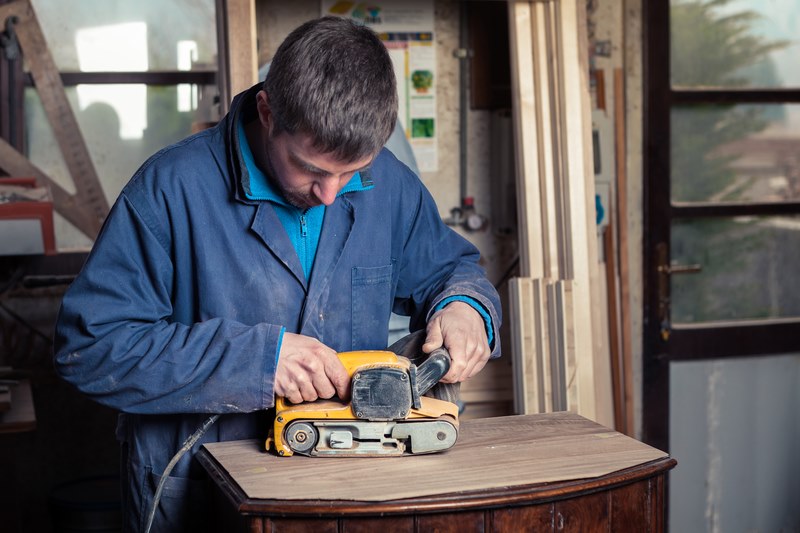
A belt sander is a power tool that used a continually moving abrasive belt to sand a variety of surfaces. This belt is moved continually round and round by an electric motor in order to sand the surface. Belt sanders are often upright and used to sand and shape smaller pieces of wood and other materials, but they are also frequently used to remove paint, varnishes or finished from wood.
Each of these sanders are excellent for sanding wooden floors and are the two main tools we use at Floor Sander Hire and recommend for our customers use for their next floor sanding project. These machines are both very big and pack a lot of power, so need to be used with care. For instance, stopping in one place for too long while sanding a floor with a belt or drum sander can damage the floor by sanding too deep in one area. This can be costly and time consuming to fix, and may not ever be able to be restored to its original condition and levelling.
Each sander can be fitted with sandpaper with different levels of abrasiveness to get a different level of sanding from the drivers, and the kind you want will depend on the condition of the floor and how deep you wish to sand.
Controlling the movement of the sander takes practise and a bit of strength too, so it’s advisable to trust a professional to operate this heavy-duty machinery. If you decide to operate a drum or belt sander yourself, be sure to first test out the feel of the sander in an area of the room that is less noticeable, such as underneath where furniture usually sits or in the corner of the room. Get a sense of the sander and how it feels to hold and move the machine before you try to sand an entire room. Always move in slow, even movements to avoid over-sanding an area.
You can cover most hardwood floor areas in this way, starting with a course, then medium, then fine sandpaper, but for the hard-to-reach places in the corners of the room and along the edge, you will need to use an edge sander. As you use these sanders, you should sweep away the dust as needed to keep a clean path, and then treat the floor at the end of your sanding session with a hardwood finish or oil treatment to help bring out its shine.
We hope this article has explained more about these two types of sanders and how they are used, but if you want to find out more about these sanders, simply click here to visit our sander products for hire page.
Floor sanding is a simple way to touch up worn down and damaged hardwood floors without removing their rustic charm. But getting this done professionally can seem like a pricey option for those who are hoping for a more affordable way to give their floors some much-needed renovation.
Do It Yourself floor sanding is always an option, and if you are willing to rub in the elbow grease and put in the extra effort, it could be a much more cost-effective option. But how much, exactly, are the DIY floor sanding costs that you’ll have to expect?
The two main tools that you will need in order to fully sand a floor are a drum sander for the main sanding efforts and an edging sander for corners. Of course, purchasing these machines for a one time job is not recommended, which is why hiring a sander is a much more affordable and easy option.
With our floor sander hire, you can expect to pay a low and reasonable price. Below you can view our variety of floor sander packages you can hire for how long along with the cost. Such as a Belt and Edger floor sander combo that you can hire for a low price of £39 for a days hire or £154 for seven days hire. We also offer weekend renting at a lower price.
Apart from these two tools, you’ll also need to have plenty of sandpaper, as you will blow through them quickly and need replacements regularly, some nail punches and hammers, and some tools for safety and protection – like dust masks or respirators and preferably some form of noise protection.
The sanding sheets you will need may total up to around the same price of hiring the respective sanders if you have a large surface area to cover, so around $20-$70 as well, becoming more expensive the more floor you have Other tools and protective items may be purchased for a relatively cheap price at your local hardware store, or you may have some of your own lying around.
After you are done sanding, you may want to coat the floor
in varnish for a proper finishing. The price of varnish differs depending on the brand and the size of the can, as well as the amount you’ll need for your overall floor. With that being said, expect an 8oz can to cost around $20 and go upwards from there. You will also need a varnish brush and some gloves if you don’t want to get your hands oily, but once again, these are available at low prices in any hardware store.
DIY floor sanding can seem like a complicated process, but in the long run it can be far cheaper. Depending on the size of your floor, the total costs may be less than a quarter of the price involved
with getting a floor professionally done.
We hope this brought you some valuable information, if you have any other questions or concerns about floor sanding costs, please do not hesitate to give us a call on 020 8427 6604.
You may wonder if the cost and trouble of sanding your floors are worth the effort. Sanding your floors is well worth the effort. As a homeowner, this is one of the simple home improvements you can make.
As time goes by your beautiful hardwood flooring will start to show signs of wear. Furniture moving across the floor, tons of traffic walking across the floor, and the temperature changes over the years will dull the shine and make the floors start to look old and tired.
The beauty of hardwood is that it can be sanded and sealed again, and the boards will look as good as they did when they were first installed. Laminate flooring imitates the look of hardwood, but when laminate gets worn it must be replaced. When hardwood gets worn it simply needs some tender loving care.
Bugs like to make homes in the spaces between floorboards. These pesky creatures can enter your home when you allow the floorboards to wear and develop spaces between them. When you sand the floor, and coat it with a protective shine coating you seal the spaces up and the bugs have no way to get inside your home.
When the protective finish coating wears off from the floorboards the dry boards beneath can start to splinter. Splinters can get in your feet, or in your children as they play on the floor. By sanding you eliminate splinters, and then when you put the protective shine coat on the boards you prevent splinters from occurring.
When hardwood floors have been sanded and coated with a quality sealer then dirt and dust do not accumulate on them or stick to them as easily as they do when the luster has worn off. It is much easier to keep your floors clean if you keep them sanded and sealed properly.
As your hardwood flooring ages, the boards begin to develop spaces between them. The nails that are holding the boards down begin to work up to the heads are slightly raised. These two things allow the floorboards to become uneven. When the boards are uneven they are subject to damage from things moving across them. Even your feet can break off a piece of board that is slightly raised above the other boards adjacent to it.
This is called gouging.
When you sand your floors, you will have to nail the nails back down to their proper place. You will then sand the boards and eliminate any pieces that might be slightly elevated. The spaces that have developed between the boards will be filled in and the strength of the entire floor will be increased.
Hardwood floors are an investment in your home. Having beautiful hardwood floors can increase the property value of your home. When you go to sell the home if the floors are wearing with age, lacklustre and shine, have gaps between the boards, then the home value will be reduced rather than increased.
Overall, sanding the floors brings the beauty and value back to the home, we hope this gave you some valuable insight to transform your home today. If you have any further questions, please do feel free to give us a call on 020 8427 6604.
Copyright © 2026. Floor Sander Hire All Rights Reserved. Website & SEO by Loop Digital.